Table of Contents
I. Install Baota Panel (V 6.8)
II. Use Baota to Install Docker and Configure Alibaba Cloud Container Service
III. Install Rancher (Server)
IV. Manage Rancher and Add Clusters
V. Add Rancher Applications, Services, and Nginx
VI. Deploy ASP.NET Core Applications
VII. Recommended Related Articles
Preface:
This article uses Centos 7.x for operations, while Rancher is officially recommended to use Ubuntu.
Docker requires a kernel version greater than 3.10; you can check your system version with uname -r.
Through Rancher, you can easily manage multiple hosts to achieve load balancing, clustering, distributed architecture, failover, status monitoring, and more.
I. Install Baota Panel (V 6.8)
The official website of Baota provides detailed installation tutorials, with different installation methods for different systems; below are some installation commands.
For detailed instructions, please visit https://www.bt.cn/bbs/thread-19376-1-1.html.
Open the server's shell terminal.
Centos installation command:
yum install -y wget && wget -O install.sh http://download.bt.cn/install/install_6.0.sh && sh install.sh
Ubuntu/Deepin installation command:
wget -O install.sh http://download.bt.cn/install/install-ubuntu_6.0.sh && sudo bash install.sh
After waiting for a while, the control panel address and account password will appear
Example as below:
Bt-Panel: http://<Your CVM IP Address>:8888
username: qbqd****
password: eeed****
#Please note down your account password
Open the panel address and log in using your account password.
Note:
For services like Alibaba Cloud and Tencent Cloud, security group restrictions may require you to add port 8888 to allow access.
II. Use Baota to Install Docker and Configure Alibaba Cloud Container Service
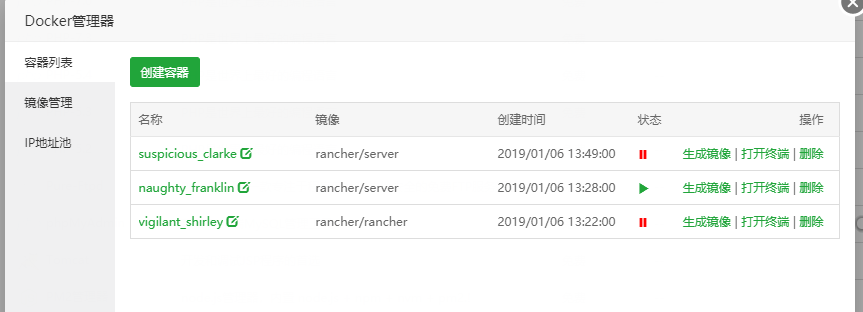
Through the Docker Manager of the Baota panel, you can easily acquire and submit images, push modified images, manage local containers, perform all visual operations, and even open a terminal for command control on individual containers.
1. After logging in to the Baota panel, click on "Software Management" on the left navigation bar, and find Docker to install it.

2. After installation, open the Docker manager (which can be found under "Software Management").
3. Click on image management and add your Alibaba Cloud image account.
You need to fill in your Alibaba Cloud RAM access control (sub-account), image repository, and namespace.
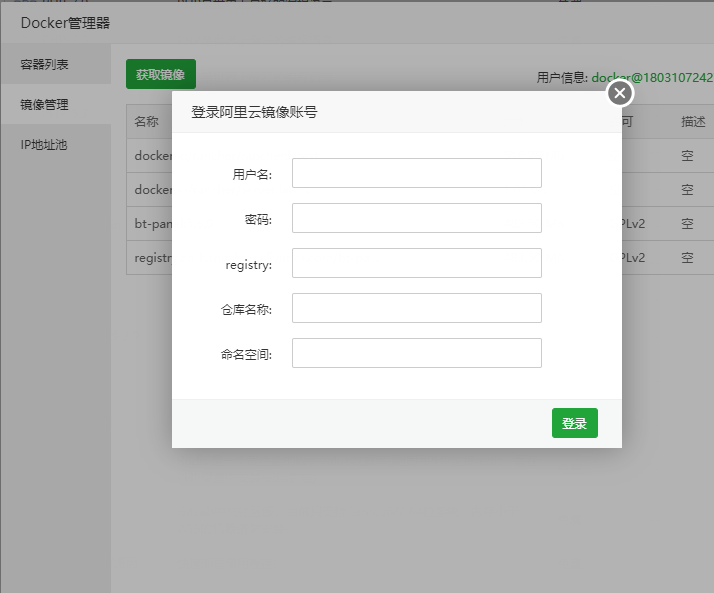
You can check or create these at the following addresses, then fill them into the Baota panel:
Namespace
https://cr.console.aliyun.com/cn-shenzhen/namespaces
Image Repository
https://cr.console.aliyun.com/cn-shenzhen/repositories
Image Accelerator
https://cr.console.aliyun.com/cn-shenzhen/mirrors
RAM Access Control
https://ram.console.aliyun.com/overview
This can usually be completed in about 5 minutes.
III. Install Rancher (Server)
Rancher is an open-source enterprise-level container management platform. With Rancher, enterprises no longer need to build a container service platform from scratch using a series of open-source software.
Rancher provides a full-stack container deployment and management platform for managing Docker and Kubernetes in a production environment.
Of course, using Rancher simplifies management but may slightly reduce server performance; however, this impact can be considered negligible.
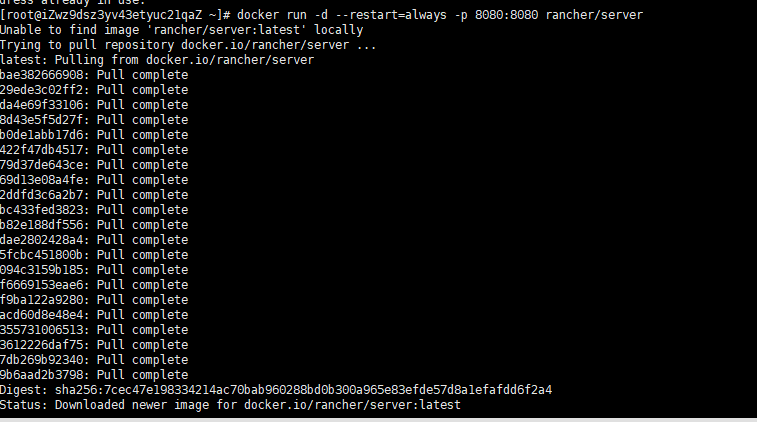
1. In the shell terminal, enter the command to install Rancher.
sudo docker run -d --restart=always -p 8080:8080 rancher/server
Note:
Rancher defaults to using port 8888.
2. Access the Rancher panel.
Open http://ip:8080 to access your panel. If you cannot access it, please check the next step.
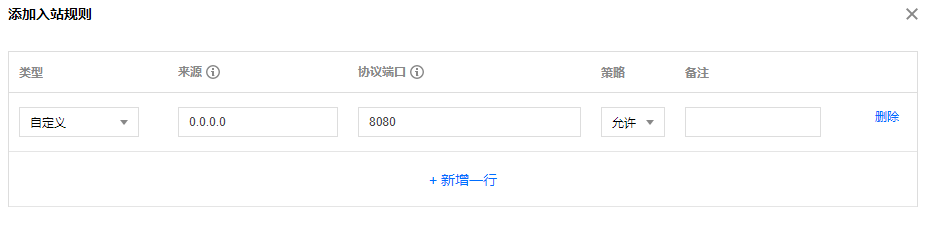
Due to security group and firewall restrictions, you need to open port 8080 in the cloud service provider's instance security group and Baota panel for normal access. It is recommended to allow ports in the range of 1-9000, as you will need to open several ports later. Allowing a range eliminates the need to add them individually.

4. View Containers and Images
In the Baota panel, under "Software Management" - Docker Management, you can view running containers and local images, and manage Docker easily through the Baota panel. You can try pushing images to Alibaba Cloud Repository.
IV. Manage Rancher and Add Clusters
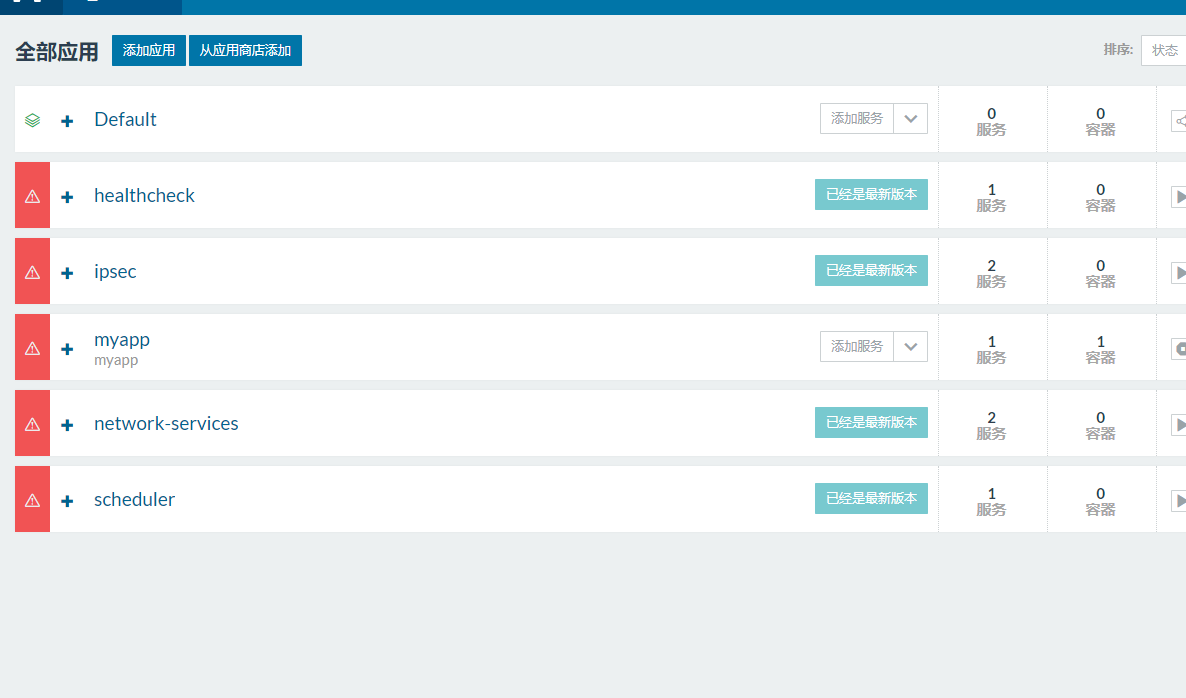
Open the full applications list to check the status; healthcheck, ipsec (except for myapp) are system services. If you see any of these in red with an exclamation mark, please check if the 500 and 4500 ports are open and then manually start them.
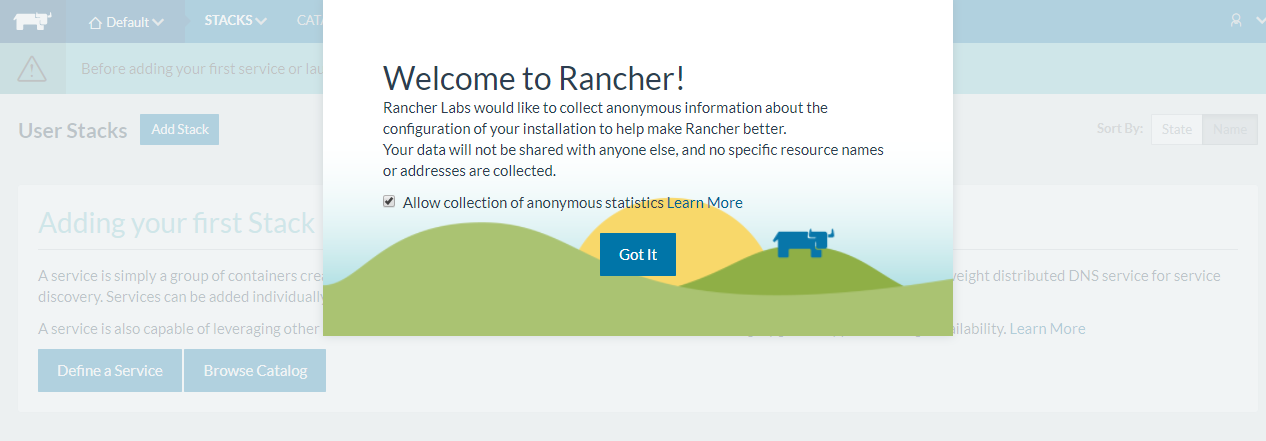
The Rancher we installed is actually the Server side, which allows managing clusters and distributed architectures.
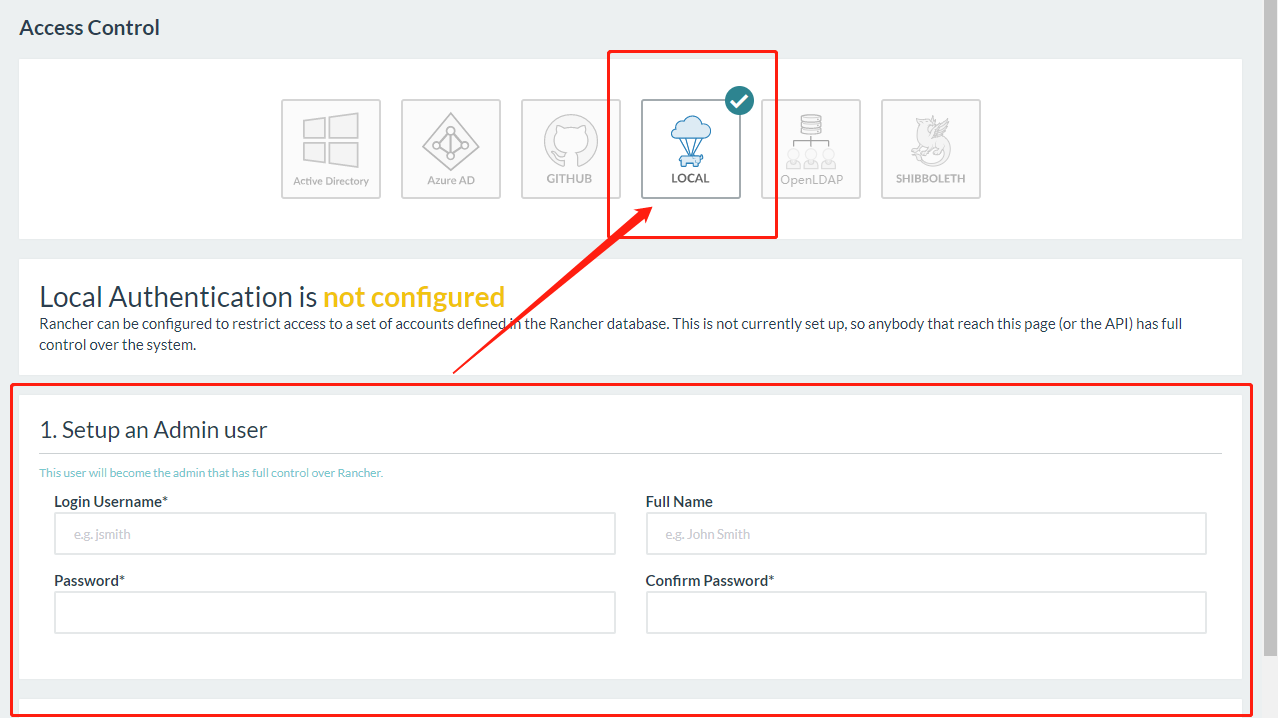
1. After opening Rancher, the first thing to do is add an admin account.
Click on the top navigation bar on ADMIN, select Access Control, then choose LOCAL from the available icons and add the account password.

2. Try switching to Chinese
Rancher has a language switch feature at the bottom; change it to Chinese for easier explanation later.

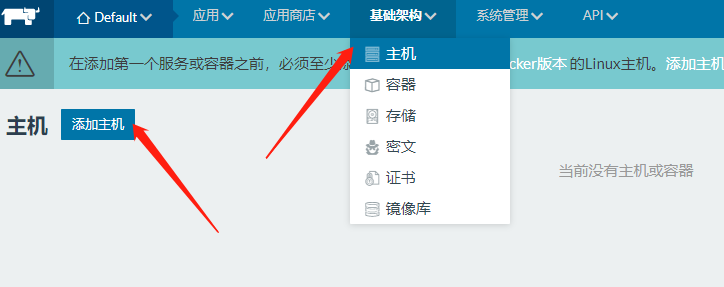
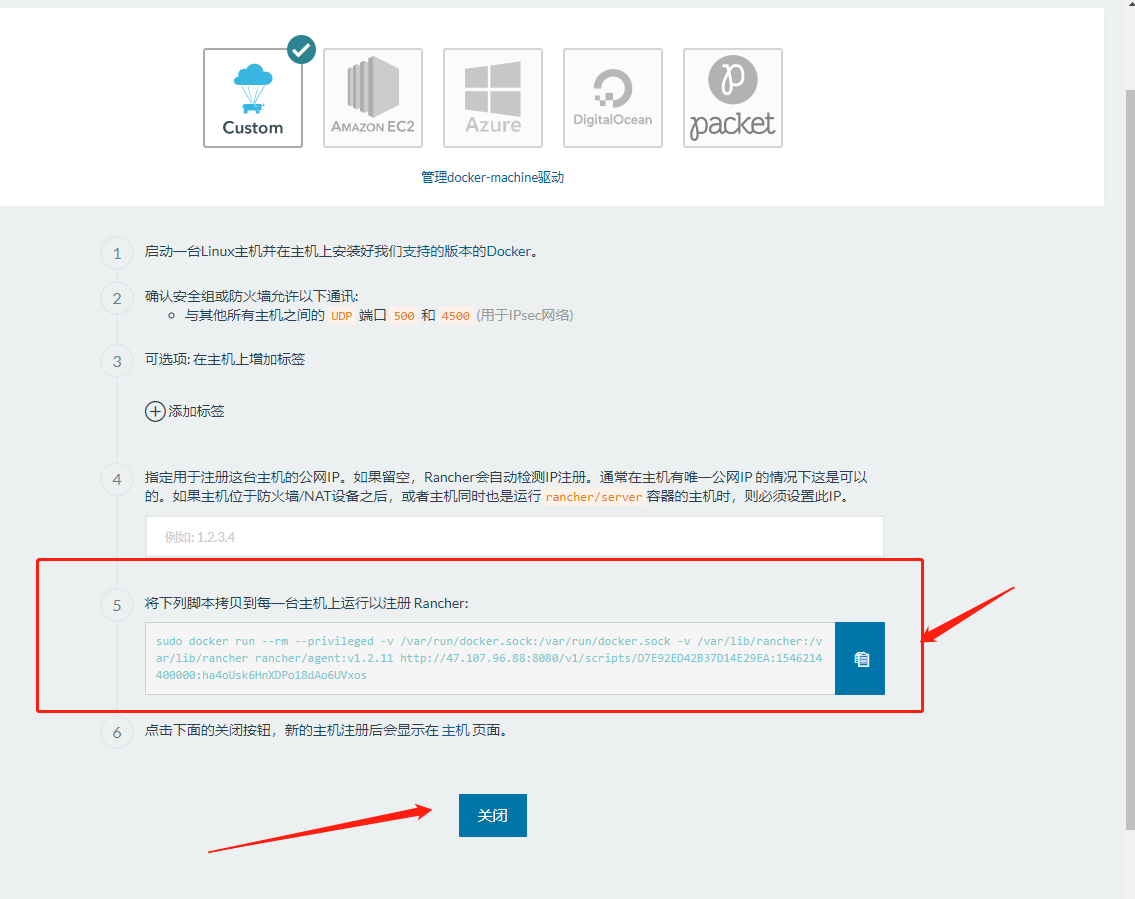
3. Add Hosts
To use Rancher, at least one host is needed, which can be the current host itself.
Click on the top navigation bar of the Rancher panel under "Infrastructure" - "Hosts", then Add Host.
This step does not require any modifications or further configuration. A script code will appear at the bottom of the page; copy this code to the terminal's shell to run it. After the shell completes the execution, click “Close” on the Rancher page; it is crucial to remember to click close.
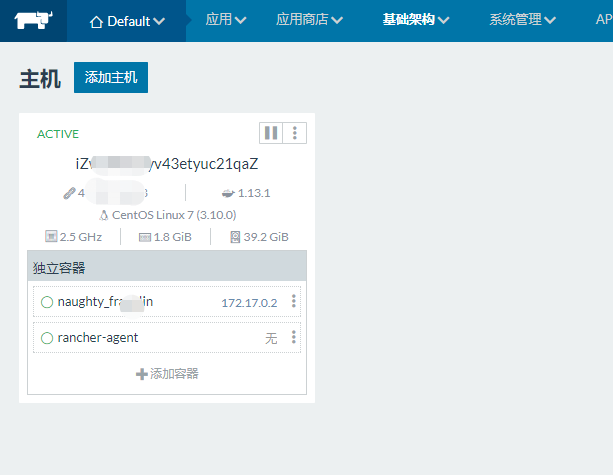
4. The host appears
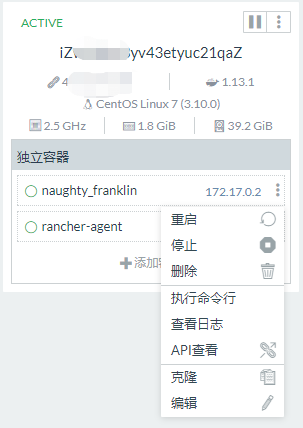
At this point, you should see the host you added, and you can monitor and modify the containers~~~
The one added here is "Custom", but you can also add hosts like Azure.
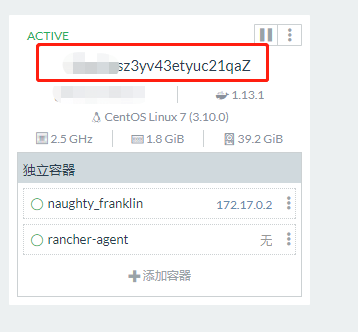
5. Use the Dashboard to Check Host Status
In the host list, click on the instance name to join the dashboard.

V. Add Rancher Applications, Services, and Nginx
This step mainly uses Nginx as an example. By creating an Nginx server, you will learn to use Rancher and related features, which can similarly be applied to deploy other applications manually.
1. Open ports 4500 and 500
4500 and 500 are required for Rancher system services.
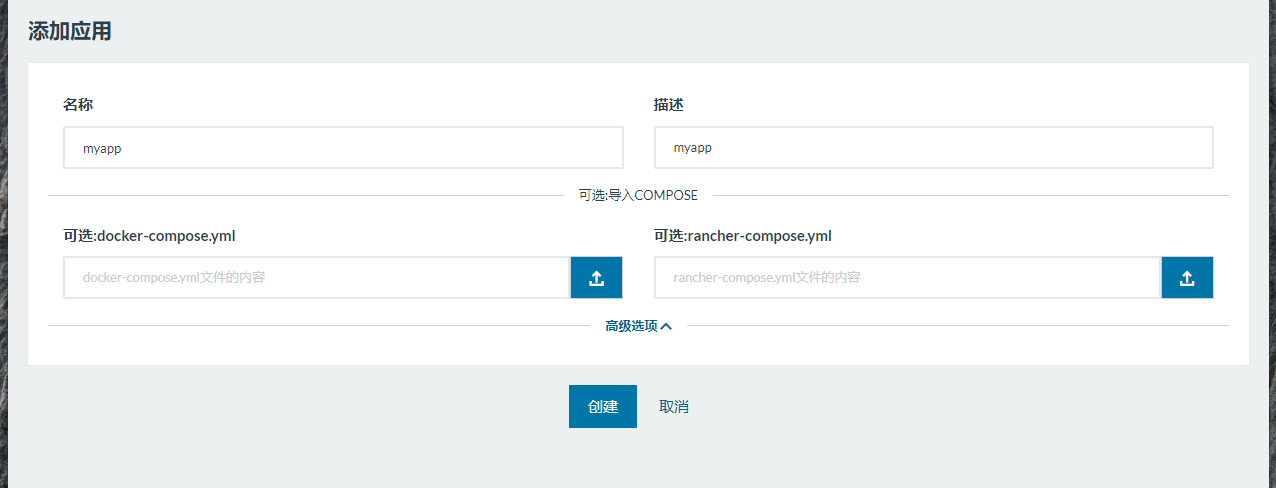
2. Add applications in Rancher
Click on the navigation bar under "Applications" - "All", and an application list will appear.
Click on "Add Application", naming it myapp.

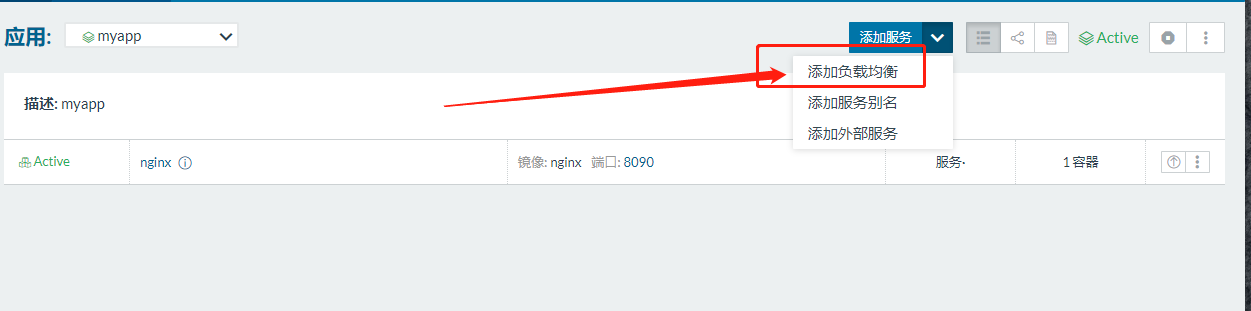
3. In the newly created application, add a service
- Name input: nginx.
- Image input: nginx, you can also choose the nginx version, using the same format as Docker images.
- Input two ports: 8090.
- No need to fill other fields; just click "Create".
The ports filled here: the public port is the port exposed by Docker to the outside, while the private container port is the port for its applications within the container.
Since we are not performing further processing on the nginx server here, the ports can be arbitrarily set as long as the public port is not occupied~
The relationship between the two ports is similar to
docker run -p 8080:8080 ... ...


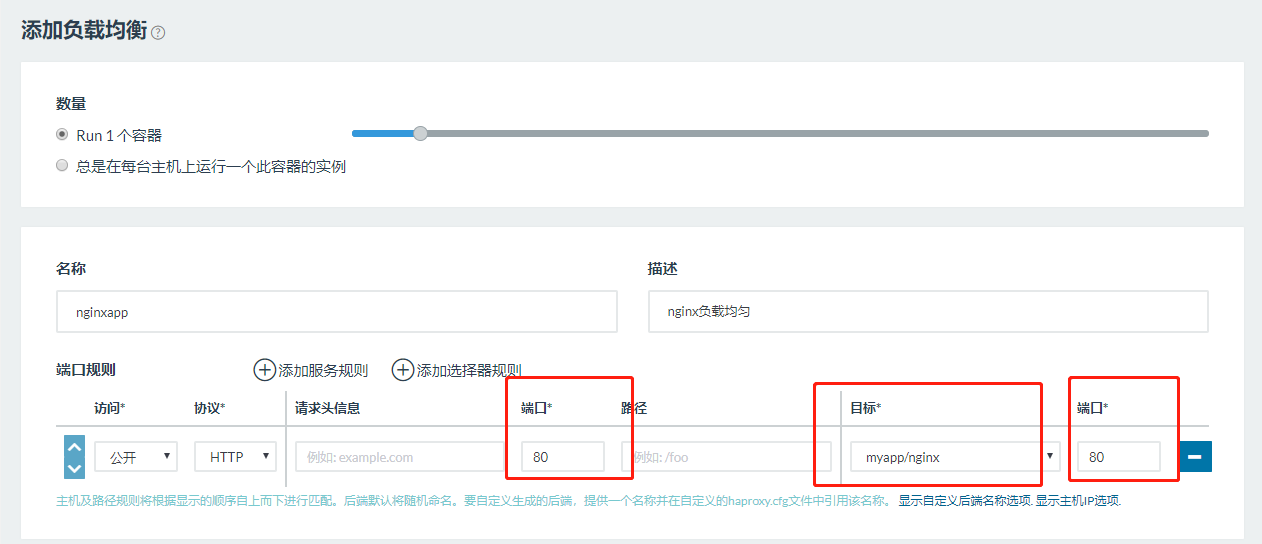
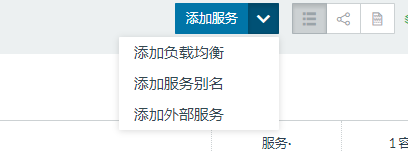
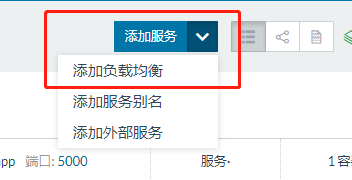
4. Add Load Balancing
In the myapp application management interface, click "Add Service" -> "Add Load Balancer", and fill in the port as 80/80. This port is used for external access to the applications within the Docker container to achieve load balancing across multiple hosts. The Load Balancing Function helps to balance the traffic on the nginx service. Do not set it to 8080 or similar; otherwise, access will fail. This function also exposes the container applications to the external network, allowing direct access to the applications.
Make sure to select the target application to expose.
。
Here, 80 is chosen as the port because the developer uses nginx to deploy the website, and website access should utilize port 80. Of course, other ports can also be freely used.
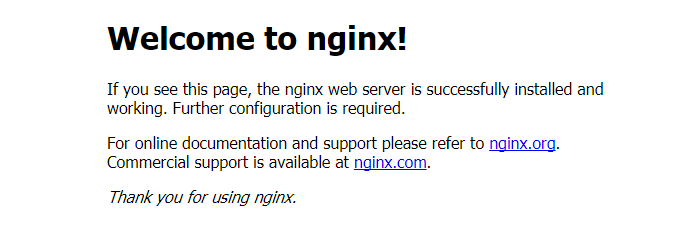
5. Accessing nginx
Open http://ip:80 or directly access http://ip
to access
6. Evenly distributed load in the cluster
By adding external services and then adding load balancing, repeating these two steps allows for load distribution in the cluster. We will not attempt this here.
Here, note the difference between load balancing and external services,
- Load balancing requires configuring the service's own port,
- while external services require configuring the exposed ports of other linked services, that is, public ports exposed by other hosts.
6. Deploying ASP.NET Core Applications
This section is unrelated to the fifth step involving Nginx. To facilitate understanding and avoid port conflicts, we will delete the created myapp.
As a .NET learner, the author certainly wants to try out ASP.NET Core~~~.
1. Add a new application named webapp

2. Add a service
For the image source, fill in microsoft/dotnet-samples:aspnetapp
This image is the default template image for ASP.NET Core provided by Microsoft. Of course, you can also package your own application, push the image to the repository, and then use Rancher to create a container.
The port is set to 5000 because ASP.NET Core uses 5000 by default; we might as well use this port too. It has no practical significance, so there's no need to focus on this point.

3. Add load balancing

4. Access the website
Access http://ip:80 or directly visit your ip
7. Recommended Related Articles
1. Using Kubernetes
Kubernetes is an open-source container cluster management system by Google.
The design goal is to provide a platform for automating deployment, scaling, and operations of application containers across clusters of hosts.
Kubernetes typically works in conjunction with the docker container tool and integrates multiple hosts that run docker containers. Kubernetes supports not only Docker but also Rocket, which is another container technology.
(Directly copied, hahahaha~~~)

Recommended article
http://blog.51cto.com/13941177/2165668
# This article provides a very detailed guide on using Rancher to install K8s, deploy clusters, configure nodes, and manage hosts while deploying web applications.
2. Containerizing Local ASP.NET Core Applications
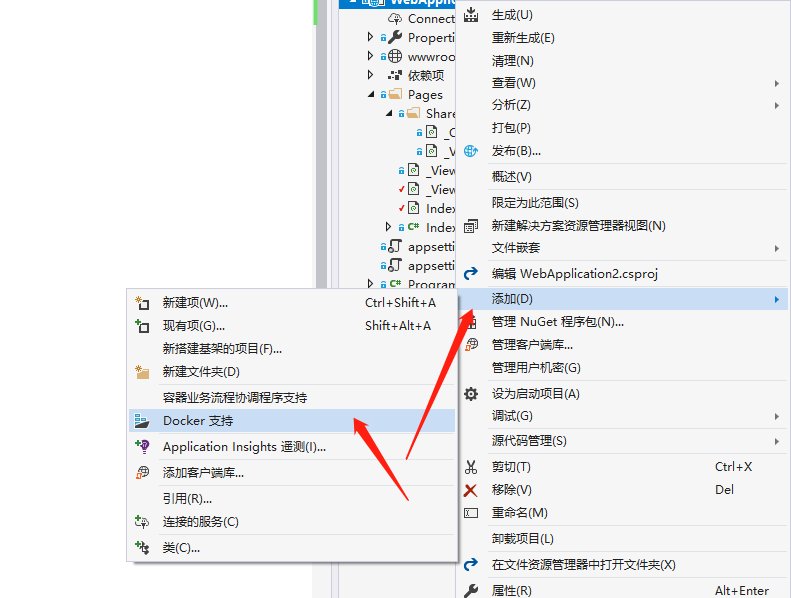
Vs2017 and above have already added Docker support for ASP.NET Core
We can facilitate development, achieving cross-platform and microservices architecture.
The author recommends the article https://www.cnblogs.com/FireworksEasyCool/p/10218384.html
# This article provides a detailed explanation of how to add Docker support to an ASP.NET Core project, package it as an image and push it to the repository, create a container on the server, and run the application.

文章评论