Install MongoDB
There are many tutorials available online for installing MongoDB, and the official MongoDB documentation can be found here: https://docs.mongodb.com/manual/tutorial/install-mongodb-on-ubuntu/
In this article, I will briefly outline the installation process, using the Ubuntu operating system.
Target version to be installed: MongoDB 4.4 Community Edition
Supported systems:
- 20.04 LTS (“Focal”)
- 18.04 LTS (“Bionic”)
- 16.04 LTS (“Xenial”)
Update the software sources
sudo apt update
sudo apt upgrade
Direct Installation via apt (Method 1)
If you want to install the stable version, simply use the following command:
sudo apt install mongodb
Execute the command to check the status of MongoDB:
sudo systemctl status mongodb
Installation via apt Repository (Method 2)
This method allows you to install the latest version of MongoDB.
Import the public key used by the package management system
wget -qO - https://www.mongodb.org/static/pgp/server-4.4.asc | sudo apt-key add -
Add the MongoDB repository source file
/etc/apt/sources.list.d/mongodb-org-4.4.list
Add the MongoDB repository source address
# ubuntu 16.04
echo "deb [ arch=amd64,arm64 ] https://repo.mongodb.org/apt/ubuntu xenial/mongodb-org/4.4 multiverse" | sudo tee /etc/apt/sources.list.d/mongodb-org-4.4.list

# ubuntu 18.04
echo "deb [ arch=amd64,arm64 ] https://repo.mongodb.org/apt/ubuntu bionic/mongodb-org/4.4 multiverse" | sudo tee /etc/apt/sources.list.d/mongodb-org-4.4.list

# ubuntu 20.04
echo "deb [ arch=amd64,arm64 ] https://repo.mongodb.org/apt/ubuntu focal/mongodb-org/4.4 multiverse" | sudo tee /etc/apt/sources.list.d/mongodb-org-4.4.list
Load MongoDB packages
sudo apt-get update
Install the latest stable version of MongoDB
sudo apt-get install -y mongodb-org
If you want to install a specific version:
sudo apt-get install -y mongodb-org=4.4.1 mongodb-org-server=4.4.1 mongodb-org-shell=4.4.1 mongodb-org-mongos=4.4.1 mongodb-org-tools=4.4.1
Start MongoDB for Method 1 and Method 2
Execute the command to check MongoDB's status:
sudo systemctl status mongodb
Start MongoDB:
sudo systemctl start mongod
Enable MongoDB to start on boot:
sudo systemctl enable mongod
Check MongoDB version:
mongo --version
mongod --version
Note: Since Linux/Unix systems restrict the number of file descriptors or threads, if you encounter errors during installation or startup, you will need to find solutions on your own; details are not provided here.
Install via Binary Package (Method 3)
This method is suitable for offline installation, using methods like tgz, deb, or source code, but here we will only use the tgz method.
Install Dependencies
# ubuntu 16.04
sudo apt-get install libcurl3 openssl liblzma5

# ubuntu 18.04 & 20.04
sudo apt-get install libcurl4 openssl liblzma5
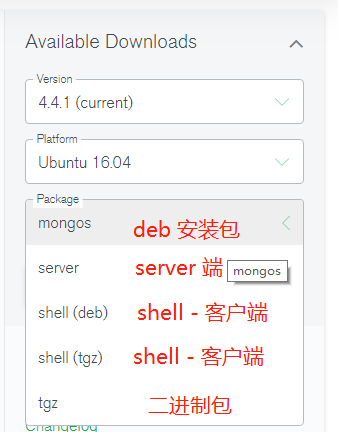
Choose the appropriate system to download the binary package:
https://www.mongodb.com/try/download/community?tck=docs_server
You can choose the package format, such as shell(deb) or shell(tgz).
Note: If you are downloading on a server, do not click Download; instead, click Copy Link to copy the download link for the binary package.
Please pay attention to the version of the software being downloaded; mongos and tagz packages contain all functionalities; others provide only server or client (shell) capabilities.
This section will provide installation instructions for both .deb and tgz packages; please choose the package you want to install! (It is recommended to download tgz directly).

Install MongoDB via deb
If you have downloaded the .deb file, use the following commands to install it.
wget {download_address}
sudo dpkg -i {package_name}.deb
Install MongoDB via tgz
If you have downloaded the .tar.gz file, use the following commands to install it.
tar -zxvf mongodb-{version}.tgz

# Below is an example
cd mongodb-linux-x86_64-ubuntu1604-4.4.1
...
|-- bin
|   `-- mongo
|-- LICENSE-Community.txt
|-- MPL-2
|-- README
`-- THIRD-PARTY-NOTICES
Open the extracted directory, and execute:
sudo cp bin/* /usr/local/bin/
# This effectively places the binary executable files into the bin directory
Start MongoDB
Create the data storage directory:
sudo mkdir -p /var/lib/mongo
Create the log storage directory:
sudo mkdir -p /var/log/mongodb
If you are not logged in as the root user, you will need to acquire file permissions:
# whoami is your username
sudo chown `whoami` /var/lib/mongo
sudo chown `whoami` /var/log/mongodb
Run MongoDB:
mongod --dbpath /var/lib/mongo --logpath /var/log/mongodb/mongod.log --fork
After this, the terminal will indicate that MongoDB has started successfully; you can also check the content of the /var/log/mongodb/mongod.log log file to confirm MongoDB's running status;
The log file cat /var/log/mongodb/mongod.log will reveal the first line:
pid=22639 port=27017
The port indicates the connection port for MongoDB.
Uninstall Methods
Apt Uninstall Method
This method is suitable for MongoDB installed using the repository.
sudo apt-get purge mongodb mongodb-clients mongodb-server mongodb-dev
sudo apt-get purge mongodb-10gen
sudo apt-get autoremove
Note: Ignore any errors during execution.
Tgz Uninstall Method
This method is suitable for uninstalling packages installed using .tar.gz.
rm /usr/local/bin/mongo*
Specify Startup Configuration
Start via Configuration File
If mentioned earlier, the configuration file /etc/mongod.conf makes it much easier to start MongoDB using the configuration file method:
mongod --config /etc/mongod.conf
Start via Parameters
Starting MongoDB via parameters can be cumbersome each time:
mongod --bind_ip=0.0.0.0 --dbpath /var/lib/mongo --logpath /var/log/mongodb/mongod.log --fork
MongoDB Binding IP and Port
Check MongoDB configuration:
# Enter shell
mongo

# Execute
use admin
db.runCommand( { getParameter : '*' } )
By default, MongoDB is a local service, and cannot be accessed from outside. Here, we will configure it to allow external connections.
After MongoDB starts, execute the following command to change the configuration.
# Bind to all addresses
mongod --bind_ip_all

# Change port
mongod --port 27017
Alternatively, stop the MongoDB service and start it with the following command:
mongod --bind_ip=0.0.0.0 --dbpath /var/lib/mongo --logpath /var/log/mongodb/mongod.log --fork
Or manually modify the /etc/mongod.conf configuration file, changing the relevant section to 0.0.0.0:
# network interfaces
net:
  port: 27017
  bindIp: 0.0.0.0
After making modifications, you will need to stop and restart MongoDB; please refer to the following section "Stop MongoDB."
Test Remote IP Connection
Test connection to the specified IP and port of the MongoDB service:
mongo {your_server_public_IP}:27017
Add Password Authentication
Set Username and Password
mongo

# After entering the MongoDB shell
use admin
db.createUser({user:"admin",pwd:"123456",roles:[{role:"root",db:"admin"}]})
If it does not take effect, please find a solution on your own; details are not provided here.
Enable Login Authentication
Next, open the /etc/mongod.conf file and change #security: to:
security:
  authorization: enabled
If it does not take effect, please find a solution on your own; details are not provided here.
Stop MongoDB
mongod --dbpath /var/lib/mongo --logpath /var/log/mongodb/mongod.log --shutdown
Building a Cluster
Following this method, you just need to create another server.
It is recommended to use Docker to set it up all at once; manually installing on a physical machine can be too troublesome.
Next, we will set up a simple replica set cluster based on the official documentation.
The official documentation can be found here: https://docs.mongodb.com/manual/replication/
Replica Set
A replica set is a group of MongoDB instances that maintain the same dataset.
The official documentation explains: a replica set consists of multiple data-bearing nodes and an optional arbiter node. Among the data-bearing nodes, only one member is considered the primary node, while the others are secondary nodes.
Using the official diagram:
Failover
In the diagram, there are three MongoDB instances; if the Primary goes down, the Secondary can replace the failed server and become the new Primary.

Since I only have two servers, I can only set up a hot standby.
Plan
Primary Node
Receives all external requests and then synchronizes the modifications to all Secondaries.
When the Primary node goes down, the other Secondaries or Arbiter nodes will re-elect a new Primary.
Secondary Node
The secondary node is a backup, mirroring the dataset from the Primary node, and can become the Primary if the Primary goes down.
Arbiter
Does not hold a dataset and cannot become Primary. Its role is to vote for a Secondary to become Primary when the Primary goes down.
But how to configure existing MongoDB instances to form a Primary - Secondary cluster? I searched for a long time.
I found the official MongoDB documentation:
https://docs.mongodb.com/manual/tutorial/deploy-replica-set/
Design Instance Names
On the primary and secondary machines, open the /etc/mongod.conf file and look for #replication, then set the node names.
replication:
  replSetName: {name}
Set the Primary machine to primary and the secondary machine to beitai.
The purpose of the replSetName is explained here:
https://docs.mongodb.com/manual/reference/configuration-options/#replication.replSetName
You can also add the --replSet "beitai" parameter when starting MongoDB.
mongod --replSet "beitai" ... ...
Please stop MongoDB before using the longer command to start MongoDB.
Execute the following on the machine designated as Primary:
mongod --replSet "primary" --bind_ip=0.0.0.0 --dbpath /var/lib/mongo --logpath /var/log/mongodb/mongod.log --fork
Execute the following on the machine designated as Secondary:
mongod --replSet "beitai" --bind_ip=0.0.0.0 --dbpath /var/lib/mongo --logpath /var/log/mongodb/mongod.log --fork
How to Create a Cluster
The following two configuration points must be satisfied:
- Add Members to a Replica Set
- Deploy a Replica Set
I encountered many pitfalls and tried various methods and configurations before successfully setting this up.
Start Two Instances (Configuration)
It's important to note that if you use rs. commands to configure instances and want to reconfigure them, if you encounter the error "errmsg" : "already initialized", you can use rs.reconfig() to clear the configuration.
rsconf = rs.conf()
rsconf.members = [{_id: 1, host: "your_local_ip:27017"}]
rs.reconfig(rsconf, {force: true})
On the Secondary machine, execute the command to stop its operation:
mongod --dbpath /var/lib/mongo --logpath /var/log/mongodb/mongod.log --shutdown
Restart the Secondary machine:
mongod --replSet "beitai" --bind_ip=0.0.0.0 --dbpath /var/lib/mongo --logpath /var/log/mongodb/mongod.log --fork
Set as Secondary node:
rs.initiate(
   {
      _id: "beitai",
      version: 1,
      members: [
         { _id: 0, host : "primary_ip:27017" }
         { _id: 1, host : "secondary_ip:27017" }
      ]
   }
)
Note: The _id signifies priority.
在 primary 机器,执行命令停止运行:
mongod --dbpath /var/lib/mongo --logpath /var/log/mongodb/mongod.log --shutdown
重新启动 primary:
mongod --replSet "beitai" --bind_ip=0.0.0.0 --dbpath /var/lib/mongo --logpath /var/log/mongodb/mongod.log --fork
在 primary 进入 shell:
mongo
执行命令进行初始化并设置自己为 primary:
rs.initiate(
   {
      _id: "primary",
      version: 1,
      members: [
         { _id: 0, host : "primary的ip:27017" },
         { _id: 1, host : "secondary的ip:27017" }
      ]
   }
)
分别在两个实例打开 mongo shell,执行:
rs.status()
发现:
beitai:SECONDARY>
...
primary:PRIMARY>
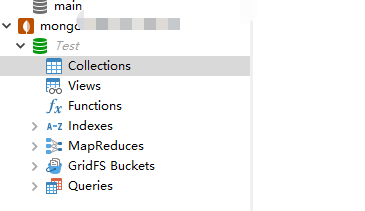
使用工具连接 MongoDB 并创建一个名为 Test 的数据库:

副本集状态查看
查看复制延迟:
rs.printSlaveReplicationInfo()
执行结果:
WARNING: printSlaveReplicationInfo is deprecated and may be removed in the next major release. Please use printSecondaryReplicationInfo instead.
source: *.*.*.*:27017
    syncedTo: Sat Oct 17 2020 20:02:49 GMT+0800 (CST)
    0 secs (0 hrs) behind the freshest member (no primary available at the moment)
source: *.*.*.*:27017
    syncedTo: Thu Jan 01 1970 08:00:00 GMT+0800 (CST)
    1602936169 secs (445260.05 hrs) behind the freshest member (no primary available at the moment)
.NET Core 连接 MongoDB
.NET 程序要连接 MongoDB ,需要通过 Nuget 包安装 MongoDB.Driver 驱动。
我们来创建一个控制台程序,Nuget 搜索 MongoDB.Driver 并安装,接下来一步步使用连接 MongoDB。
文档地址:https://mongodb.github.io/mongo-csharp-driver/2.10/getting_started/
添加 using 引用:
using MongoDB.Bson;
using MongoDB.Driver;
连接 MongoDB
var client = new MongoClient("mongodb://primary的ip:27017,secondary的ip:27017");
获取数据库
IMongoDatabase database = client.GetDatabase("Test");
获取文档集合
var collection = database.GetCollection<BsonDocument>("MyCollection");
插入文档(json)
            var document = new BsonDocument
            {
                { "name", "MongoDB" },
                { "type", "Database" },
                { "count", 1 },
                { "info", new BsonDocument
                {
                    { "x", 203 },
                    { "y", 102 }
                }}
            };
其源结构的 json 如下:
{
     "name": "MongoDB",
     "type": "database",
     "count": 1,
     "info": {
         x: 203,
         y: 102
     }
}
将文档插入到集合中:
            collection.InsertOne(document);
            // 使用异步 await collection.InsertOneAsync(document);
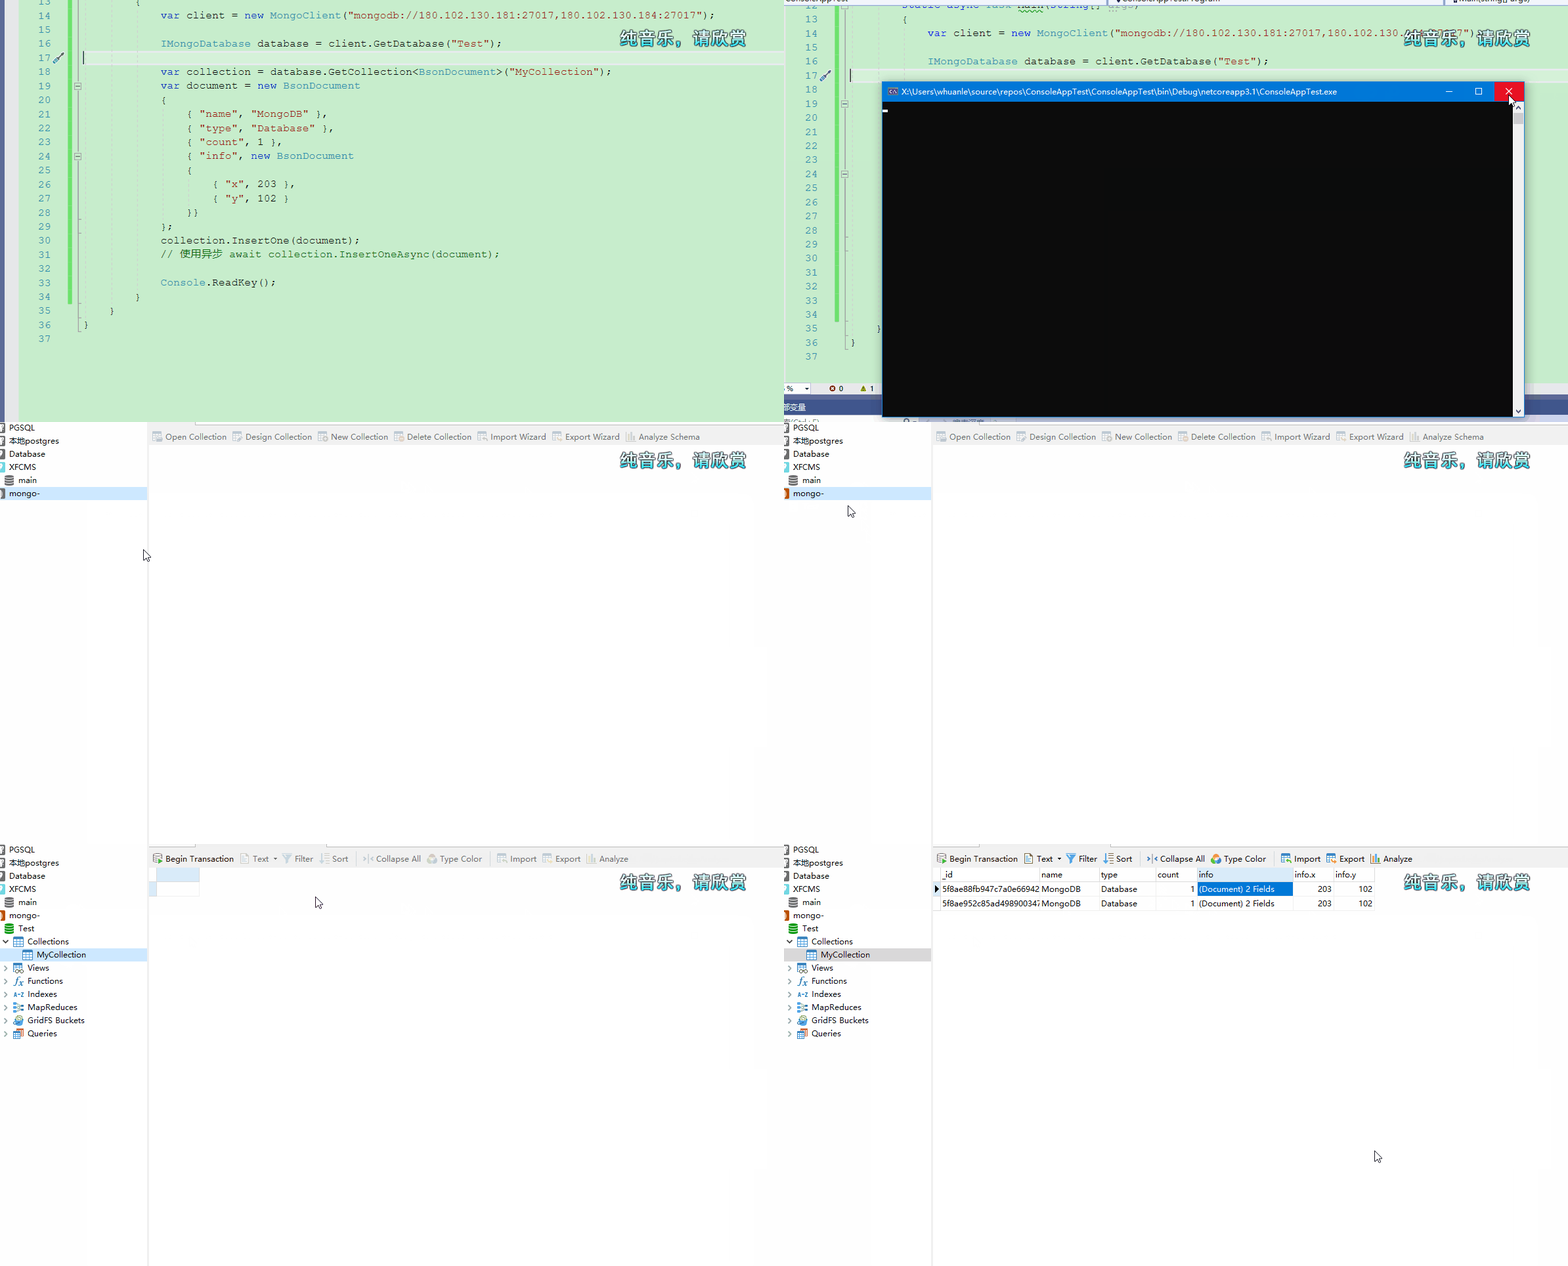
然后执行程序,一会儿后,打开 MongoDB 管理器,查看集合。


文章评论