目录
- Introduction
- Deploying Jenkins
- Installing Plugins
- Pulling Images
- Creating Jenkinsfile Script
- Building Pipeline
- Observation
Jenkins Build Automation for .NET Core Release Images
Introduction
In this chapter, we will introduce how to deploy and start Jenkins using Docker on Linux, write scripts, automate the build of .NET Core applications, and finally package the .NET Core application into a Docker image.
Deploying Jenkins
Please ensure that Docker is installed on Linux beforehand. In Linux, we use Docker to start Jenkins to avoid manually installing a large number of dependencies and polluting the local environment, as well as to facilitate quick startups and fault recovery.
After installing Docker, use
docker versionto check the Docker version. The Docker version cannot be 1.x or 3.x; please upgrade to version 18.x or higher. Generally, the latest version is installed on Ubuntu systems, but in CentOS, the default mirror source contains older versions, and you need to manually add a new mirror source for the newer version before upgrading.
Please refer to: https://www.cnblogs.com/harlanzhang/p/9965534.html
Since we will use the container to provide an environment and use Docker to package .NET Core programs into Docker images, we need to map the Docker .sock file in the Jenkins container so that Docker commands can still be used within the container.
Create a /var/jenkins_home directory on the host machine to back up the data in Jenkins.
To start Jenkins with Docker on Linux, use the following command:
docker run \
  -u root \
  -itd \
  -p 8080:8080 \
  -p 50000:50000 \
  -v /var/jenkins_home:/var/jenkins_home \
  -v /var/run/docker.sock:/var/run/docker.sock \
  jenkinsci/blueocean
Once started, use docker logs {containerID} to check the logs and obtain the Jenkins login password, which is a string of hashed characters, e.g., 1abc12445adcf.
Finally, access Jenkins by opening port 8080.
Installing Plugins
After logging into Jenkins, you will be prompted to install recommended plugins. Please follow the prompts to install the recommended plugins. The list of recommended plugins is as follows:
Folders Plugin
OWASP Markup Formatter Plugin
Build Timeout
Credentials Binding Plugin
Timestamper
Workspace Cleanup
Ant
Gradle
Pipeline
GitHub Branch Source Plugin
Pipeline: GitHub Groovy Libraries
Pipeline: Stage View
Git plugin
SSH Build Agents
Matrix Authorization Strategy Plugin
PAM Authentication
LDAP
Email Extension
Mailer Plugin
Localization: Chinese (Simplified)
Additionally, to support container packaging, the following plugins need to be manually installed.
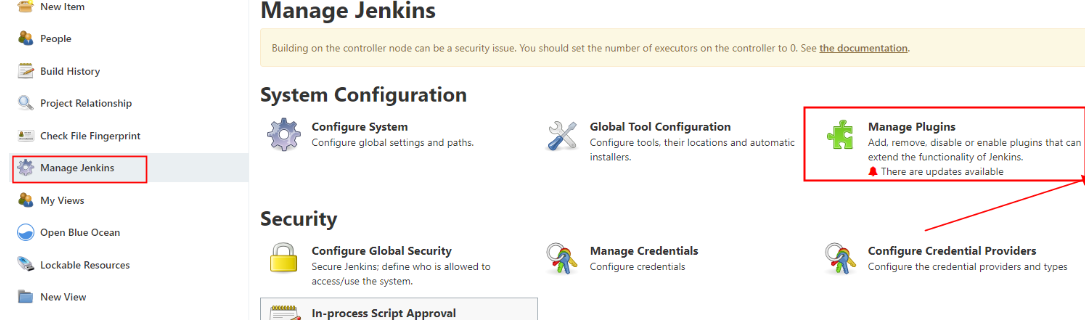
# Provide Docker support (mandatory)
docker
Docker Pipeline
docker-build-step

# Visual design tool for pipeline scripts (mandatory)
Blue Ocean

# Provide support for GitLab; if not using, can skip installation
gitlab

# Provide Git parameterization and hook trigger build support; not necessary can skip installation
Git Parameter
Generic Webhook Trigger
Pulling Images
Here we introduce two images that we will use later.
Pull a .NET Core SDK image. Each time we start the pipeline, a .NET Core SDK container will be initiated to provide an environment for compiling and publishing .NET Core applications.
docker pull mcr.microsoft.com/dotnet/sdk:3.1
Pull an ASP.NET Core Runtime image, which serves as the base image for creating application images.
docker pull mcr.microsoft.com/dotnet/aspnet:3.1
List of images:
mcr.microsoft.com/dotnet/aspnet   3.1          ac199e8d6dff   2 weeks ago   208MB
mcr.microsoft.com/dotnet/sdk      3.1          82e2a34647f0   2 weeks ago   710MB
Creating Jenkinsfile Script
I have provided a demo project for everyone. Please visit https://github.com/whuanle/DotNetCoreJenkinsDemo repository and fork it to your own repository. We will use this ASP.NET Core demo program to practice the process later.
In the project files, you can find a Jenkinsfile, which defines the steps of our pipeline.
Let's take a look at a simple Jenkinsfile template:
pipeline {
    stages {
        stage('Build') {
            steps {
                echo 'Building..'
            }
        }
        stage('Test') {
            steps {
                echo 'Testing..'
            }
        }
        stage('Deploy') {
            steps {
                echo 'Deploying....'
            }
        }
    }
}
In stages, we define the stages of the pipeline. In the template, we defined three stages: Build, Test, and Deploy.
Each stage can define multiple steps (steps), and each step can execute various types of actions.
    stage('Test') {
        steps {
            echo 'Testing..'
        }
    }
The Jenkinsfile in the demo is quite simple. Let's look at the contents of the Publish stage:
        stage('Publish') {
            steps {
                sh 'dotnet publish src/WebDemo -c Release'
            }
        }
It’s very straightforward; each step executes a shell command. We can use sh '...' to indicate the shell command to be executed in this step.
Next, let's take a look at the first two parts of the Jenkinsfile:
    // Global environment variables
    environment {
        IMAGENAME     = 'webdemo'       // Image name
        IMAGETAG      = '1.0.0'         // Image tag
        APPPORT       = '8089'          // Application port
        APPDIR        = '/opt/app'      // Application working directory
    }

    agent {
        docker {
            image 'mcr.microsoft.com/dotnet/sdk:3.1'
            args '-v /var/run/docker.sock:/var/run/docker.sock -v /usr/bin/docker:/usr/bin/docker'
        }
    }
In environment, we can define the environment variables for this build process.
agent is the node selector, which can choose the environment in which to start the pipeline, types like node and docker.
Building Pipeline
Log into the Jenkins web backend, click New Item in the left menu to start creating a pipeline.
Jenkins offers various pipeline styles and additional plugins to incorporate more pipeline types. We mainly focus on Freestyle project, Pipeline, and Multibranch Pipeline.
-
Freestyle project
A Freestyle project pipeline is quite flexible and allows for creating pipelines without requiring changes to the project, enabling a variety of options and configurations. However, if processes need to change, it can be cumbersome to modify.
-
Pipeline, Multibranch Pipeline
They can handle multiple branches simultaneously, both rely on the Jenkinsfile file in the project. The advantage of Multibranch Pipeline is that it can inspect multiple branches simultaneously and create build jobs for each branch, while the Pipeline places multiple branches into a single job.
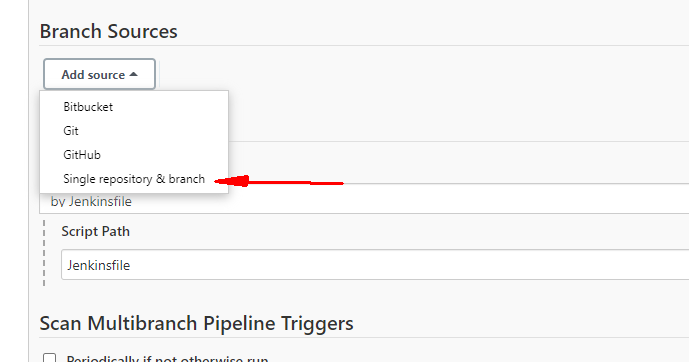
Click New Item, create a pipeline, and choose Multibranch Pipeline.
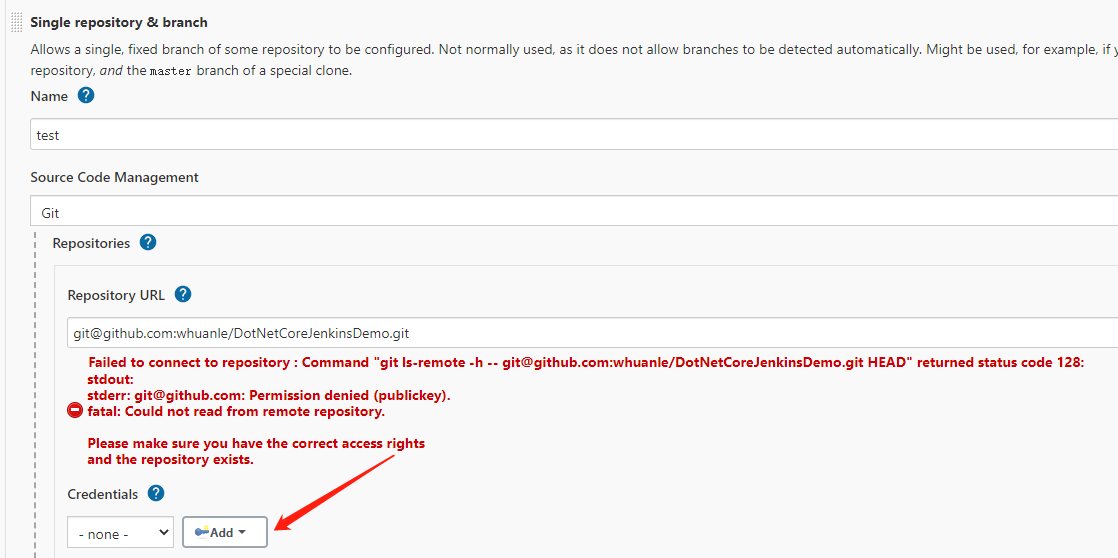
For adding Git source code, we can freely select one type, with a recommendation to use Single repository & branch.
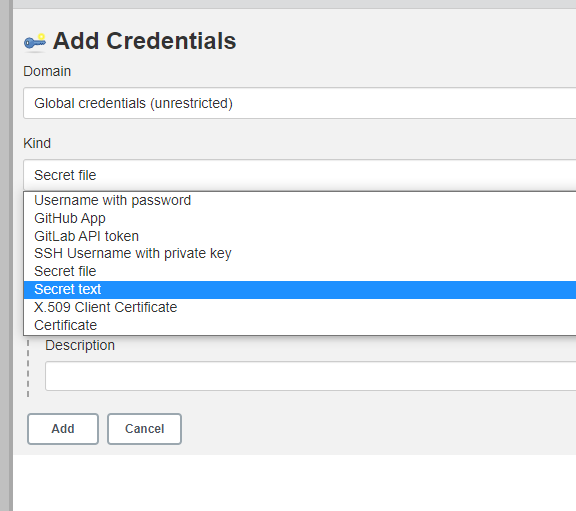
Since we haven't added a key, Jenkins cannot access your GitHub repository, so we need to add an accessible key.
Find a computer that has Git installed, generate a public-private key pair to provide an encrypted connection between Jenkins and GitHub.
Execute the command:ssh-keygen -t rsa -b 2048 -C "email@example.com"Follow the prompts to specify the path to store the key, such as
D:/id_rsa.
After executing the command, two files will be generated:id_rsaandid_rsa.pub. Copy the contents ofid_rsa(private key) into Jenkins.
Then add the contents ofid_rsa.pub(public key) to your GitHub account.
You can use various ways to add authentication. The simplest and most secure is using a key; you can choose Secret file and upload the private key or use another method. We won’t elaborate on that here.
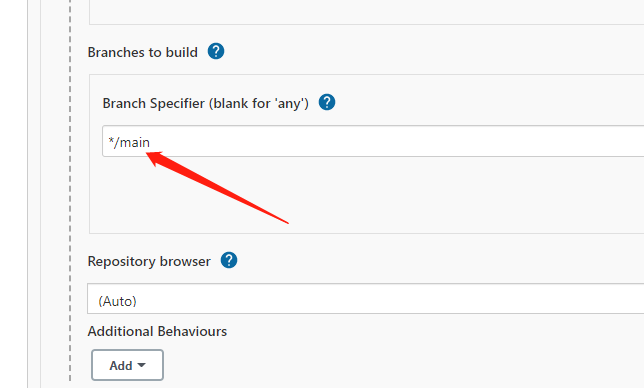
Then select the branch for publication and save it directly.
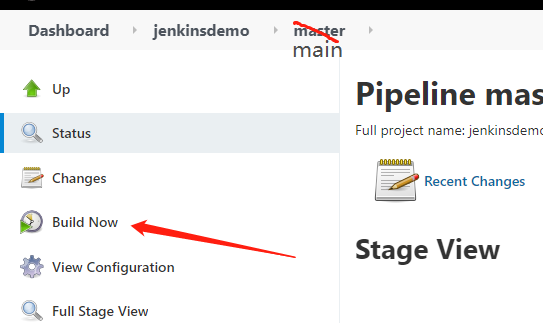
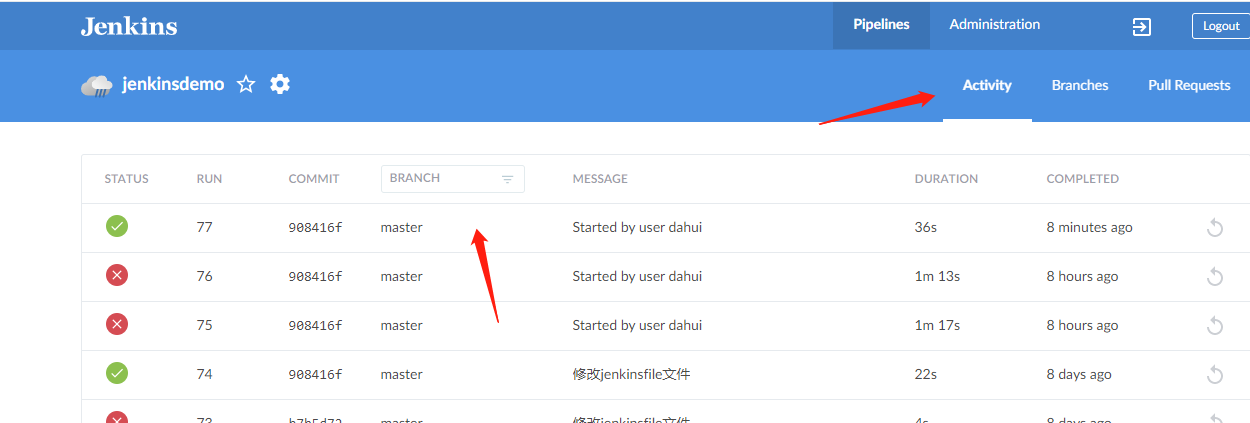
Then return to the main interface, open the pipeline we created, and click Build Now to start the pipeline.
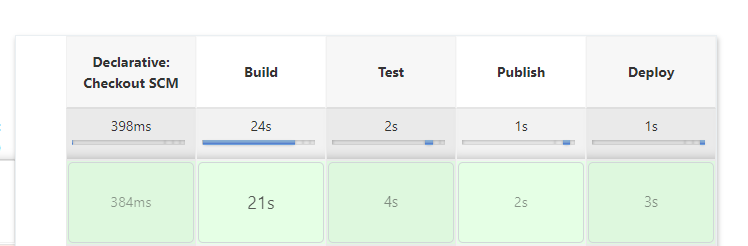
Successful build screenshot:
On the Linux server, check the list of images:
root@localhost ~ 19:54:20 # docker images
REPOSITORY                        TAG          IMAGE ID       CREATED         SIZE
webdemo                           1.0.0        79b636ddef73   2 minutes ago   208MB
We can see that the application has been automatically packaged into an image, and the image name and version number can be set in the Jenkinsfile.
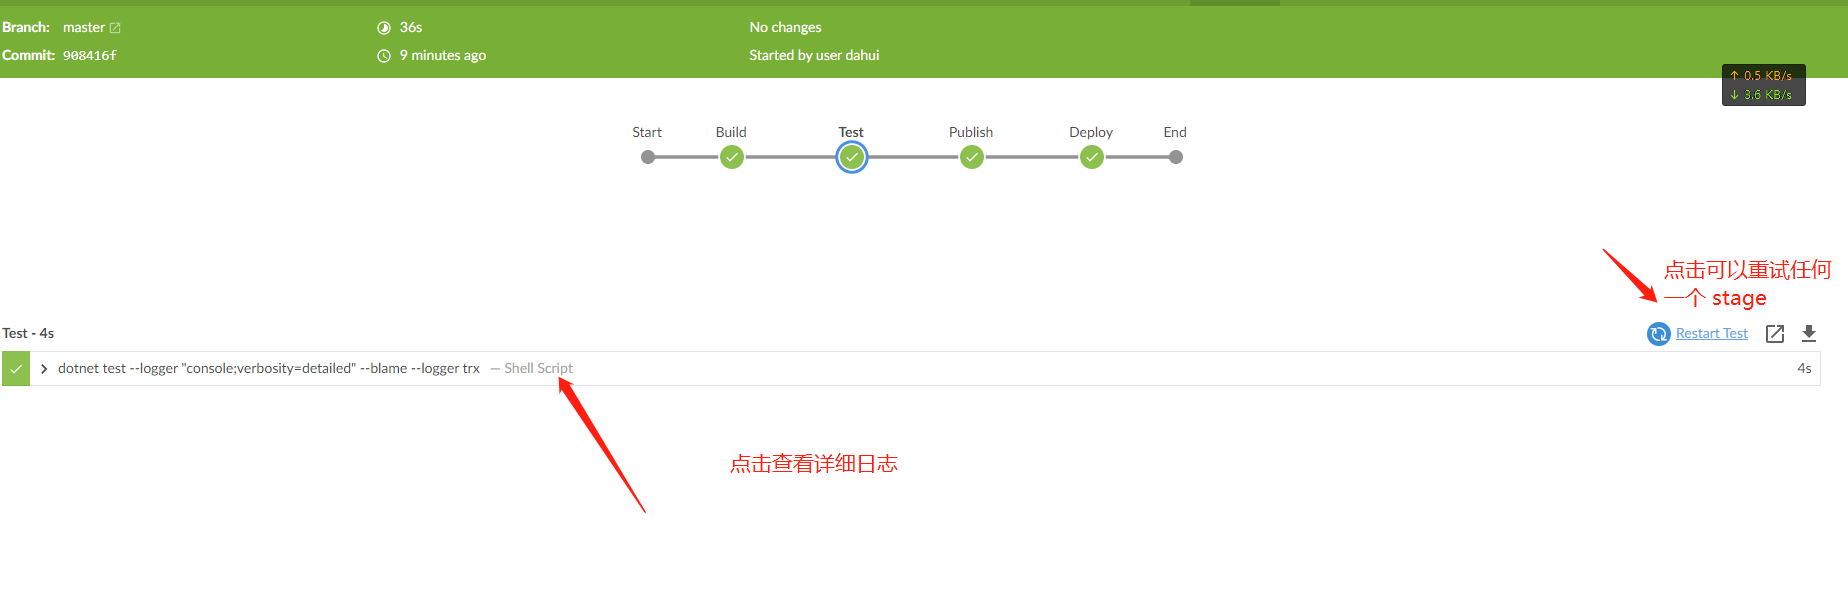
Observation
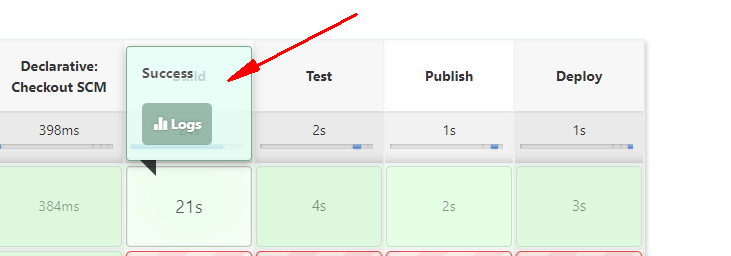
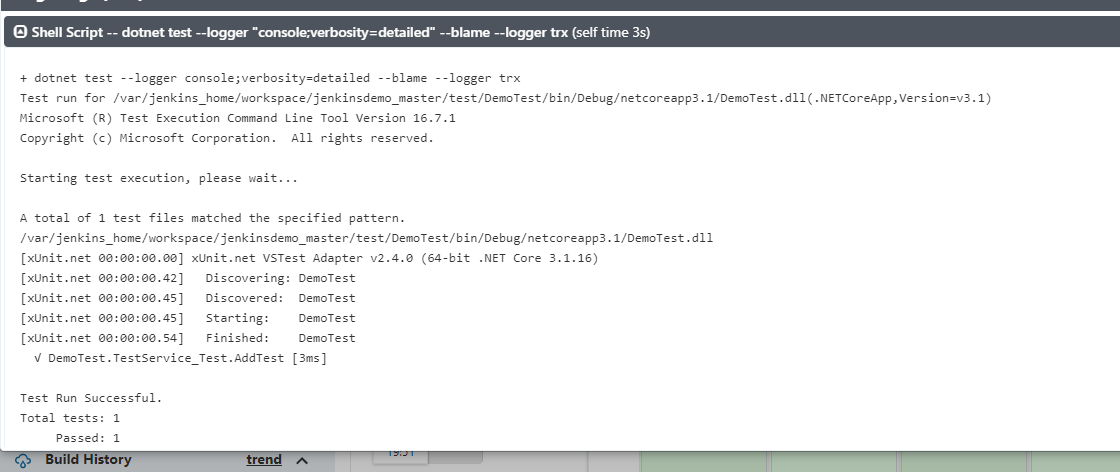
We can observe the logs of each step in the build interface.
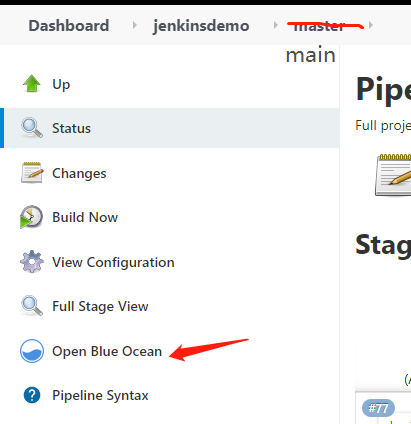
In Open Blue Ocean, there is a more visually appealing UI and convenient tools.
Visual design of pipeline steps.

Observe the building process.

文章评论