Background
The initial approach adopted was to develop using Maui + Blazor, utilizing the Blazor UI framework, which has high community popularity.
However, during the development process, there were numerous pitfalls with Maui and the Blazor UI framework. The pages and styles written using Blazor UI did not pass the scrutiny of the designers and product managers.
Ultimately, it was decided to use a native front-end combined with generating static content to place into Maui, then packaging and releasing the two together.
First, Focus on the Frontend
For the front-end, just follow the normal development patterns without polluting the front-end code.
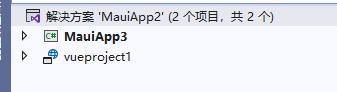
You can create a front-end project using VS and place it into the solution, or you can create a separate directory to place the front-end code.

Create a MAUI Blazor Project
Create a MAUI Blazor project, and the solution is shown below:
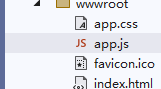
First, move the wwwroot/css/app.css file out and place it into wwwroot, then create a new app.js file also placed in wwwroot.
Delete the content in the app.css file that is unrelated to Blazor, keeping only the following:
#blazor-error-ui {
    background: lightyellow;
    bottom: 0;
    box-shadow: 0 -1px 2px rgba(0, 0, 0, 0.2);
    display: none;
    left: 0;
    padding: 0.6rem 1.25rem 0.7rem 1.25rem;
    position: fixed;
    width: 100%;
    z-index: 1000;
}

#blazor-error-ui .dismiss {
    cursor: pointer;
    position: absolute;
    right: 0.75rem;
    top: 0.5rem;
}

.blazor-error-boundary {
    background: url(data:image/svg+xml;base64,PHN2ZyB3aWR0aD0iNTYiIGhlaWdodD0iNDkiIHhtbG5zPSJodHRwOi8vd3d3LnczLm9yZy8yMDAwL3N2ZyIgeG1sbnM6eGxpbms9Imh0dHA6Ly93d3cudzMub3JnLzE5OTkveGxpbmsiIG92ZXJmbG93PSJoaWRkZW4iPjxkZWZzPjxjbGlwUGF0aCBpZD0iY2xpcDAiPjxyZWN0IHg9IjIzNSIgeT0iNTEiIHdpZHRoPSI1NiIgaGVpZ2h0PSI0OSIvPjwvY2xpcFBhdGg+PC9kZWZzPjxnIGNsaXAtcGF0aD0idXJsKCNjbGlwMCkiIHRyYW5zZm9ybT0idHJhbnNsYXRlKC0yMzUgLTUxKSI+PHBhdGggZD0iTTI2My41MDYgNTFDMjY0LjcxNyA1MSAyNjUuODEzIDUxLjQ4MzcgMjY2LjYwNiA1Mi4yNjU4TDI2Ny4wNTIgNTIuNzk4NyAyNjcuNTM5IDUzLjYyODMgMjkwLjE4NSA5Mi4xODMxIDI5MC41NDUgOTIuNzk1IDI5MC42NTYgOTIuOTk2QzI5MC44NzcgOTMuNTEzIDI5MSA5NC4wODE1IDI5MSA5NC42NzgyIDI5MSA5Ny4wNjUxIDI4OS4wMzggOTkgMjg2LjYxNyA5OUwyNDAuMzgzIDk5QzIzNy45NjMgOTkgMjM2IDk3LjA2NTEgMjM2IDk0LjY3ODIgMjM2IDk0LjM3OTkgMjM2LjAzMSA5NC4wODg2IDIzNi4wODkgOTMuODA3MkwyMzYuMzM4IDkzLjAxNjIgMjM2Ljg1OCA5Mi4xMzE0IDI1OS40NzMgNTMuNjI5NCAyNTkuOTYxIDUyLjc5ODUgMjYwLjQwNyA1Mi4yNjU4QzI2MS4yIDUxLjQ4MzcgMjYyLjI5NiA1MSAyNjMuNTA2IDUxWk0yNjMuNTg2IDY2LjAxODNDMjYwLjczNyA2Ni4wMTgzIDI1OS4zMTMgNjcuMTI0NSAyNTkuMzEzIDY5LjMzNyAyNTkuMzEzIDY5LjYxMDIgMjU5LjMzMiA2OS44NjA4IDI1OS4zNzEgNzAuMDg4N0wyNjEuNzk1IDg0LjAxNjEgMjY1LjM4IDg0LjAxNjEgMjY3LjgyMSA2OS43NDc1QzI2Ny44NiA2OS43MzA5IDI2Ny44NzkgNjkuNTg3NyAyNjcuODc5IDY5LjMxNzkgMjY3Ljg3OSA2Ny4xMTgyIDI2Ni40NDggNjYuMDE4MyAyNjMuNTg2IDY2LjAxODNaTTI2My41NzYgODYuMDU0N0MyNjEuMDQ5IDg2LjA1NDcgMjU5Ljc4NiA4Ny4zMDA1IDI1OS43ODYgODkuNzkyMSAyNTkuNzg2IDkyLjI4MzcgMjYxLjA0OSA5My41Mjk1IDI2My41NzYgOTMuNTI5NSAyNjYuMTE2IDkzLjUyOTUgMjY3LjM4NyA5Mi4yODM3IDI2Ny4zODcgODkuNzkyMSAyNjcuMzg3IDg3LjMwMDUgMjY2LjExNiA4Ni4wNTQ3IDI2My41NzYgODYuMDU0N1oiIGZpbGw9IiNGRkU1MDAiIGZpbGwtcnVsZT0iZXZlbm9kZCIvPjwvZz48L3N2Zz4=) no-repeat 1rem/1.8rem, #b32121;
    padding: 1rem 1rem 1rem 3.7rem;
    color: white;
}

.blazor-error-boundary::after {
    content: "An error has occurred."
}

.status-bar-safe-area {
    display: none;
}

@supports (-webkit-touch-callout: none) {
    .status-bar-safe-area {
        display: flex;
        position: sticky;
        top: 0;
        height: env(safe-area-inset-top);
        background-color: #f7f7f7;
        width: 100%;
        z-index: 1;
    }

	.flex-column, .navbar-brand {
		padding-left: env(safe-area-inset-left);
	}
}
Next, place the following code in app.js to dynamically import the generated CSS files:
function InitializeCss(name) {
    document.getElementById("app-css").innerHTML = '<link rel="stylesheet" href="' + name + '">';
}
Then delete the js and css directories.
The remaining files are shown in the image below:
Then modify index.html so that the content is as follows:
<!DOCTYPE html>
<html lang="en">
<head>
	<meta charset="utf-8" />
	<meta name="viewport" content="width=device-width, initial-scale=1.0, maximum-scale=1.0, user-scalable=no, viewport-fit=cover" />
	<title>MauiApp3</title>
	<base href="/" />
	<link href="/app.css" rel="stylesheet" />
</head>

<body>
	<div id="app-css"></div>
	<div class="status-bar-safe-area"></div>
	<div id="app">Loading...</div>

	<div id="blazor-error-ui">
		An unhandled error has occurred.
		<a href="" class="reload">Reload</a>
		<a class="dismiss">🗙</a>
	</div>
	<script src="app.js"></script>
	<script src="_framework/blazor.webview.js" autostart="false"></script>

</body>

</html>
The added <div id="app-css"></div> is used to dynamically load the CSS files.
The other content remains largely unchanged.
Open MainLayout.razor, which is responsible for dynamically loading front-end files, and its content is as follows:
@using MauiApp3.Data
@inherits LayoutComponentBase
@code {
#region static fields
private static readonly string[] css;
private static readonly string[] js;
#endregion
#region instance fields
[Inject]
private IJSRuntime JS { get; set; }
#endregion
static MainLayout()
{
var path = Windows.ApplicationModel.Package.Current.InstalledLocation.Path;
if (Directory.Exists(Path.Combine(path, "wwwroot", "css")))
{
var cssList = Directory.GetFiles(Path.Combine(path, "wwwroot", "css"))
.Where(x => x.EndsWith(".css"))
.Select(x => Path.GetFileName(x)).ToArray();
css = cssList;
}
else css = Array.Empty<string>();
if (Directory.Exists(Path.Combine(path, "wwwroot", "js")))
{
var jsList = Directory.GetFiles(Path.Combine(path, "wwwroot", "js"))
.Where(x => x.EndsWith(".js"))
.Select(x => Path.GetFileName(x)).ToArray();
js = jsList;
}
else js = Array.Empty<string>();
}
protected override async Task OnInitializedAsync()
{
await Task.CompletedTask;
}
protected override async Task OnAfterRenderAsync(bool firstRender)
{
if (firstRender)
{
foreach (var item in css)
{
await JS.InvokeVoidAsync("InitializeCss", $"css/{item}");
}
foreach (var item in js)
{
await JS.InvokeAsync<IJSObjectReference>("import", $"/js/{item}");
}
}
}
}
Then, in order to automatically copy the content generated by the front-end into Maui, a script can be set. In the Maui .csproj, add the following content:
	<Target Name="ClientBuild"   BeforeTargets="BeforeBuild">
		<Exec WorkingDirectory="../vueproject1" Command="npm install" />
		<Exec WorkingDirectory="../vueproject1" Command="npm run build" />
		<Exec WorkingDirectory="../vueproject1" Command="DEL "dist\index.html"" />
		<Exec WorkingDirectory="./" Command="RMDIR /s/q "css"" />
		<Exec WorkingDirectory="./" Command="RMDIR /s/q "js"" />
		<Exec WorkingDirectory="../vueproject1" Command="Xcopy "dist" "../MauiApp3/wwwroot"  /E/C/I/Y" />
		<Exec WorkingDirectory="./" Command="RMDIR /s/q "$(LayoutDir)""/>
	</Target>
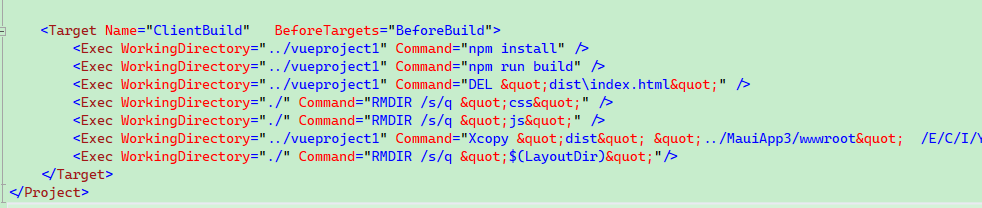
This way, when the Maui project starts, it will build the front-end project and copy the generated files (excluding index.html) into the wwwroot directory.
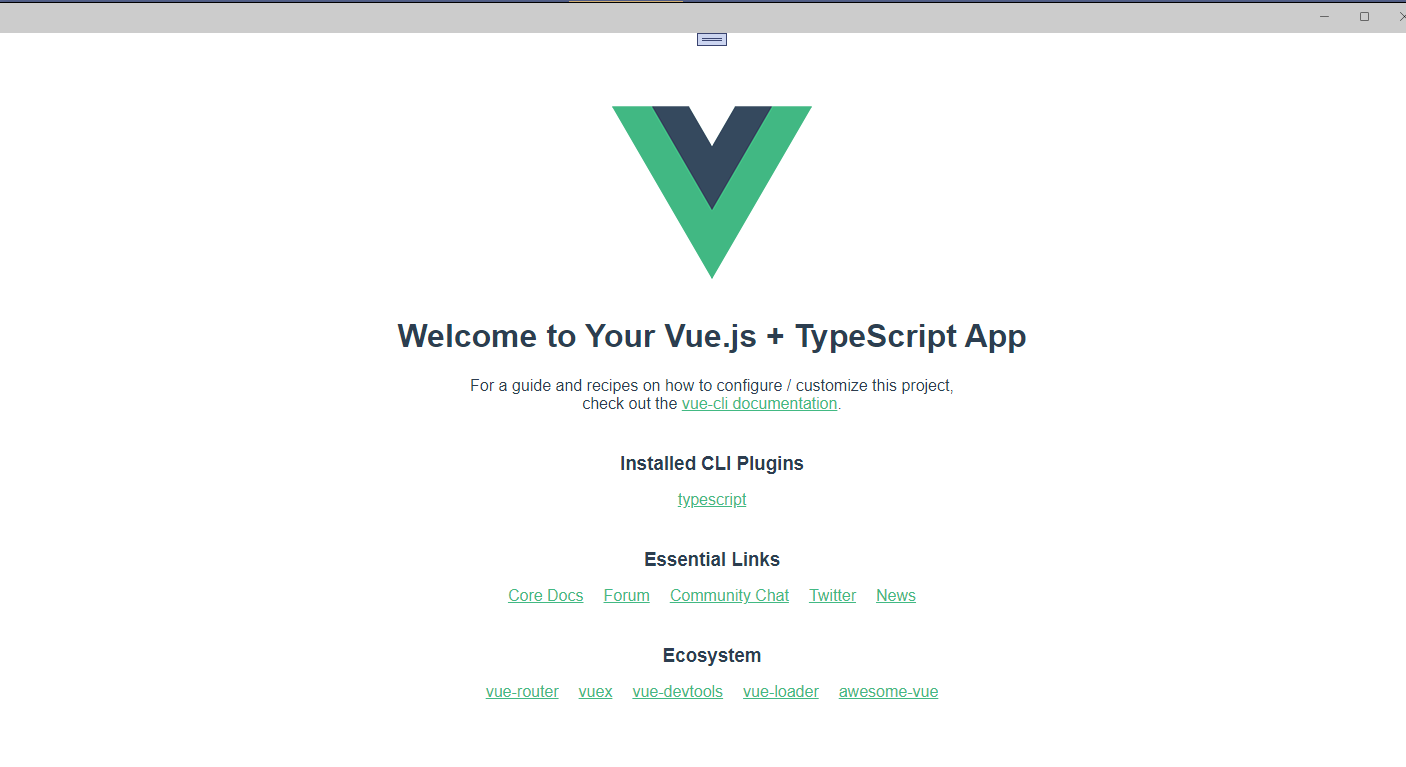
After starting:

文章评论