Introduction
Selenium Official Website: https://www.selenium.dev/
Selenium is a powerful automation testing toolset that encompasses a series of tools and libraries for automating web browsers, consisting of the following three projects:
- Selenium WebDriver
- Selenium IDE
- Selenium Grid
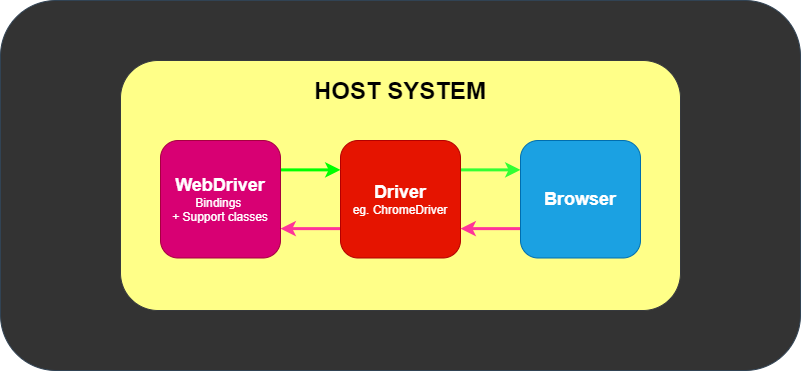
The core of Selenium is WebDriver, which can run across many browsers and drives the browser in a native way.
The architecture of WebDriver is designed as follows:
For each browser, a specific driver is written, such as ChromeDriver, which operates the browser and provides various operation interfaces. Selenium has designed the WebDriver abstraction to allow the use of various browser drivers through a unified abstraction.
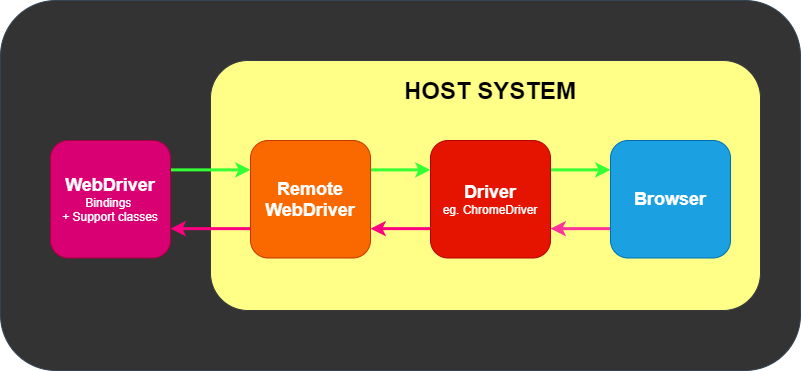
Alternatively, remote access can also be utilized:
Below I will introduce how to use Selenium WebDriver to write automated testing programs in C#.
Installing Dependencies
To create a C# console project, first install the dependency package Selenium.WebDriver, which provides the basic APIs and unified abstractions for browser driver interfaces.
Selenium.WebDriver
Next, install the specific driver implementation for your browser:
Selenium.WebDriver.ChromeDriver
Just search for
Selenium.WebDriver, and then add the appropriate suffix for the browser to download the corresponding browser driver.
First Demo
Open: https://www.selenium.dev/selenium/web/web-form.html
This URL is an official testing page, containing a variety of HTML components for our learning usage.
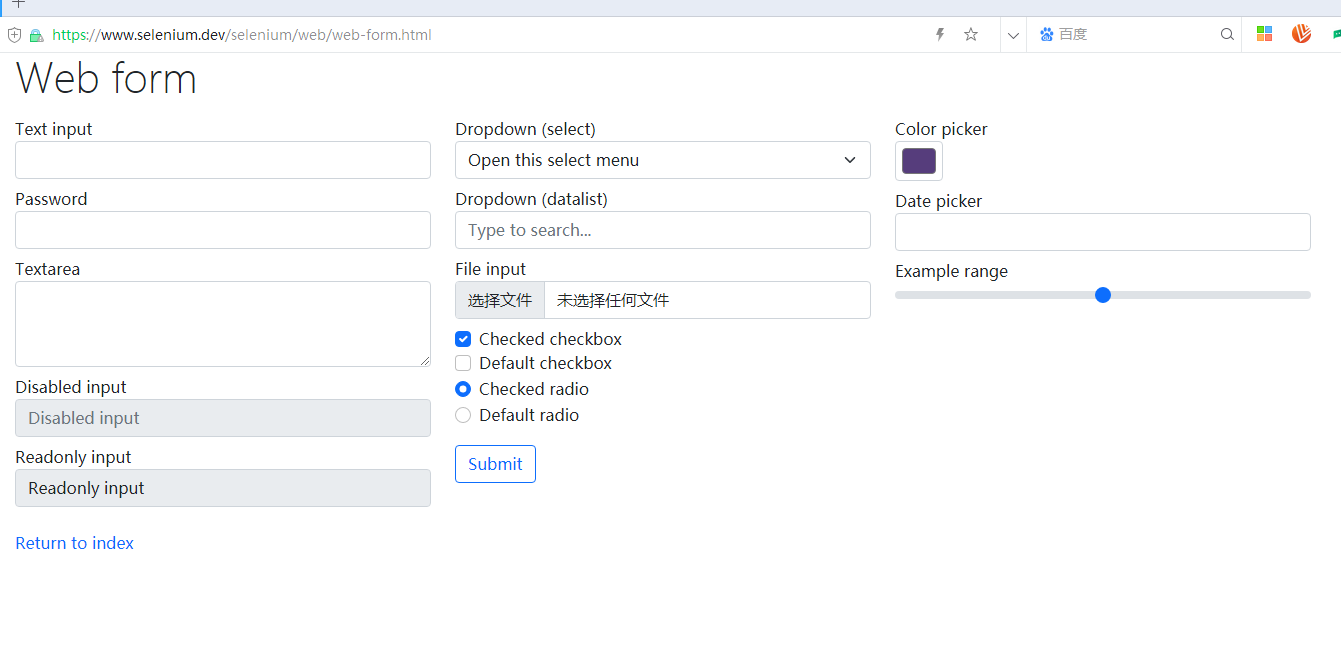
The following example includes code for opening the page, finding elements, filling in content, and retrieving information, allowing readers to run this code to understand the basic execution flow of writing automated testing programs. More details will be covered in the following sections.
using OpenQA.Selenium;
using OpenQA.Selenium.Chrome;

class Program
{
	static void Main()
	{
        // Using the ChromeDriver
		IWebDriver driver = new ChromeDriver();

		// Open this page on startup
		driver.Navigate().GoToUrl("https://www.selenium.dev/selenium/web/web-form.html");

		// Get page information
		var title = driver.Title;
		// Implicit wait, elements on the page may not appear immediately and require some time
		driver.Manage().Timeouts().ImplicitWait = TimeSpan.FromMilliseconds(500);
		// Search for elements
		var textBox = driver.FindElement(By.Name("my-text"));
		var submitButton = driver.FindElement(By.TagName("button"));

		// Fill the input box with text
		textBox.SendKeys("Selenium");
		// Click the submit button
		submitButton.Click();

		// After clicking the submit button, the page refreshes; at this point, we retrieve elements from the redirected page
		var message = driver.FindElement(By.Id("message"));
		var value = message.Text;

		// Quit the driver
		driver.Quit();
	}
}
Note: When the demo program starts, it will launch Chrome browser; if the browser starts too slowly, the demo program may throw an error and quit.
Therefore, it is recommended to start the Chrome browser first, then start the demo program to reduce the time for launching a new Chrome browser window.
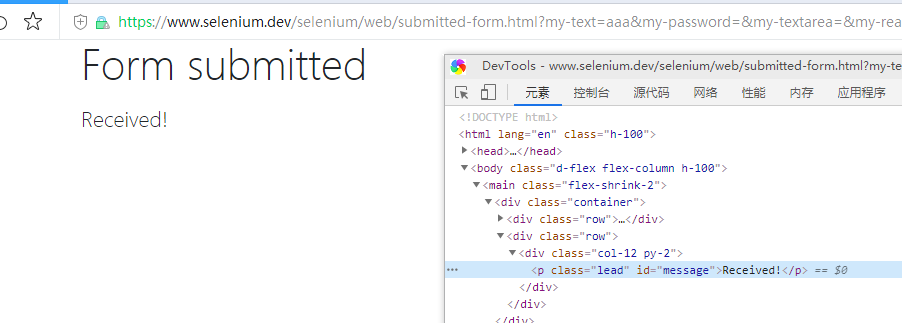
After starting, the demo program will automatically fill out the form and submit, then it will redirect to a new page.
Page Load Strategies
There are various page development models, such as PHP and ASP, which are integrated development models, where the server renders and returns the entire page, or frameworks that load static resources separately before using backend APIs to load data to generate the page.
Often, the rendering of the page may not be completed quickly, and some page elements may take time to appear. While using WebDriver, we can also decide when to start automation operations based on our needs.
There are three basic page load strategies:
| Strategy | Ready State | Notes |
| -------- | ----------- | -------------------------------------------------------- |
| normal | complete | Default value, waits for all resources to download |
| eager | interactive | The DOM is ready for access, but other resources such as images may still be loading. |
| none | Any | WebDriver will not block at all; it only waits for the initial page to download. |
If the page takes a long time to load due to downloading resources that are unimportant for automation (such as images, CSS, or JS), you can change the default normal parameter to eager or none to speed up the session load time.
Setting method:
var chromeOptions = new ChromeOptions();
chromeOptions.PageLoadStrategy = PageLoadStrategy.Normal;
IWebDriver driver = new ChromeDriver(chromeOptions);
Additionally, WebDriver provides three ways to wait for the appearance of page elements:
- Explicit wait
- Implicit wait
- Fluent wait
We can use waits to let the findElement call wait until dynamically added elements are added to the DOM:
WebDriverWait wait = new WebDriverWait(driver, TimeSpan.FromSeconds(10));
IWebElement firstResult = wait.Until(e => e.FindElement(By.XPath("//a/h3")));
This method is called explicit wait.
WebDriver will wait for the element at the path //a/h3 to appear, with a maximum wait time of 10 seconds.
Using implicit wait, WebDriver polls the DOM for a certain period when trying to locate any element. This is useful when some elements on the webpage are not immediately available and require time to load.
Implicit wait tells WebDriver to poll the DOM for a time when looking for one or more elements that are not readily available. Once set, the implicit wait is set for the session's lifecycle.
Setting the polling time for implicit wait:
driver.Manage().Timeouts().ImplicitWait = TimeSpan.FromMilliseconds(500);
Warning: Do not mix implicit and explicit waits. Doing so can lead to unpredictable wait times. For example, setting an implicit wait of 10 seconds and an explicit wait of 15 seconds may result in a timeout occurring after 20 seconds.
Fluent wait defines the maximum amount of time to wait for a condition and the frequency with which to check the condition.
Users can configure waits to ignore specific types of exceptions that may occur while waiting, such as NoSuchElementException when searching for an element on the page:
WebDriverWait wait = new WebDriverWait(driver, timeout: TimeSpan.FromSeconds(30))
{
	PollingInterval = TimeSpan.FromSeconds(5),
};
Proxies
A proxy server acts as an intermediary for requests between clients and servers. Using a proxy server for Selenium automation scripts can be beneficial in the following aspects:
- Capturing network traffic
- Simulating backend responses from websites
- Accessing targeted sites under complex network topologies or strict corporate restrictions/policies.
If you are in a corporate environment, or you need to access the internet while on a plane where the browser cannot connect to a URL, you need to use a proxy for access.
Selenium WebDriver provides a way to set up a proxy, as illustrated in the following code example:
using OpenQA.Selenium;
using OpenQA.Selenium.Chrome;

class Program
{
	static void Main()
	{
		ChromeOptions options = new ChromeOptions();

		Proxy proxy = new Proxy();
		proxy.Kind = ProxyKind.Manual;
		proxy.IsAutoDetect = false;
		proxy.SslProxy = "<HOST:PORT>";
		options.Proxy = proxy;
		options.AddArgument("ignore-certificate-errors");

		IWebDriver driver = new ChromeDriver(options);
		driver.Navigate().GoToUrl("https://www.selenium.dev/");
	}
}
Browser Version
For example, if you want to run Chrome version 67 on Windows XP:
var chromeOptions = new ChromeOptions();

chromeOptions.BrowserVersion = "67";
chromeOptions.PlatformName = "Windows XP";
Element Operations
Element operations mainly consist of the following types:
- File Upload
- Query Network Elements: Locate elements based on provided locator values
- Web Element Interactions: A set of advanced commands for manipulating forms
- Locating Strategies: Methods for identifying one or more specific elements within the DOM
- Element Information: HTML element properties
Let’s introduce different methods for operating various HTML elements.
File Upload
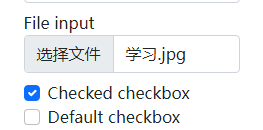
Uploading a file is essentially filling in the local path of the file address in the type=file input tag; this address must specify the absolute path to the file.
using System;
using OpenQA.Selenium;
using OpenQA.Selenium.Chrome;

namespace SeleniumDocumentation.SeleniumPRs
{
	class FileUploadExample
	{
		static void Main(String[] args)
		{
			IWebDriver driver = new ChromeDriver();
			try
			{
				// Navigate to URL
				driver.Navigate().GoToUrl("https://www.selenium.dev/selenium/web/web-form.html");
				// The file path must exist; do not fill in arbitrarily, use absolute path
				driver.FindElement(By.Name("my-file")).SendKeys("D:/Desktop/images/学习.jpg");
				var submitButton = driver.FindElement(By.TagName("button"));

				submitButton.Click();

				if (driver.PageSource.Contains("File Uploaded!"))
				{
					Console.WriteLine("file uploaded");
				}
				else
				{
					Console.WriteLine("file not uploaded");
				}

				driver.Quit();
			}
			catch (Exception ex)
			{
				Console.WriteLine(ex);
			}
		}
	}
}
Finding Elements
There are 8 different built-in element locating strategies in WebDriver:
| Locator | Description |
| ---------------- | ----------------------------------------------------------- |
| class name | Locate elements that match the class attribute and search value (compound class names are not allowed) |
| css selector | Locate elements that match the CSS selector |
| id | Locate elements that match the id attribute |
| name | Locate elements that match the name attribute |
| link text | Locate anchor elements that fully match the visible text of the link |
| partial link text| Locate anchor elements where the visible text partially matches the search value. The first matching element will be selected if multiple elements match. |
| tag name | Locate elements that match the tag name |
| xpath | Locate elements that match the XPath expression |
Here is a use case for finding elements:
// By id or name
IWebElement vegetable = driver.FindElement(By.ClassName("tomatoes"));
IWebElement fruits = driver.FindElement(By.Id("fruits"));
IWebElement fruit = fruits.FindElement(By.ClassName("tomatoes"));

// Using css selector
var fruit = driver.FindElement(By.CssSelector("#fruits .tomatoes"));

// Return multiple elements
IReadOnlyList<IWebElement> plants = driver.FindElements(By.TagName("li"));
To get which element currently has focus on the page:
var element = driver.SwitchTo().ActiveElement();
string attr = element.GetAttribute("title");

Interacting with Page Elements
There are only five basic commands available for element operations:
- Click (applies to any element)
- Send keys (applies only to text fields and editable content elements,
.SendKeys()) - Clear (applies only to text fields and editable content elements)
- Submit (applies only to form elements) (no longer recommended in Selenium 4)
- Select (find element)
Click
You can trigger a click event on an element:
var submitButton = driver.FindElement(By.TagName("button"));
submitButton.Click();
Input
The element sends a key command using .SendKeys(), this method is applicable to any editable elements like input, select, etc.
driver.FindElement(By.Name("my-file")).SendKeys("D:/Desktop/images/学习.jpg");
Clear
For editable text or elements with input, such as text areas, select boxes, or file upload boxes, you can clear the current value property of the elements.
IWebElement searchInput = driver.FindElement(By.Name("q"));
searchInput.SendKeys("selenium");
// Clears the entered text
searchInput.Clear();
Getting Element Properties
- Visibility
- Enabled status
- Selected status
- Get element tag name
- Location and size
- Get element CSS values
- Text content
- Get features or attributes
In JS, we can get a value or other attributes of an element like this:
document.getElementById("my-text-id").value
"111111111"
In WebDriver, element properties can be accessed through the fields/properties of the IWebElement interface, but not many:
Boolean is_email_visible = driver.FindElement(By.Name("email_input")).Displayed;
Other required properties can be obtained using methods like GetAttribute, such as:
string attr = element.GetAttribute("title");
The definition of IWebElement is as follows:
  public interface IWebElement : ISearchContext
  {
    string TagName { get; }
    string Text { get; }
    bool Enabled { get; }
    bool Selected { get; }
    Point Location { get; }
    Size Size { get; }
    bool Displayed { get; }
    void Clear();
    void SendKeys(string text);
    void Submit();
    void Click();
    string GetAttribute(string attributeName);
    string GetDomAttribute(string attributeName);
    string GetDomProperty(string propertyName);
    string GetCssValue(string propertyName);
    ISearchContext GetShadowRoot();
  }
Browser Page
There are generally four operations for browser pages:
-
Open a website
-
Go back
-
Go forward
-
Refresh
The example code is also quite simple:
// Open
driver.Navigate().GoToUrl(@"https://selenium.dev");
// Go back
driver.Navigate().Back();
// Go forward
driver.Navigate().Forward();
// Refresh
driver.Navigate().Refresh();
User Login Credentials
Currently, only two login authentication methods have been discovered: Basic and Cookie. The JWT Token method, which requires setting Header values, has not been found.
Here is an example of opening a webpage using Cookie:
var chromeOptions = new ChromeOptions();
IWebDriver driver = new ChromeDriver(chromeOptions);
try
{
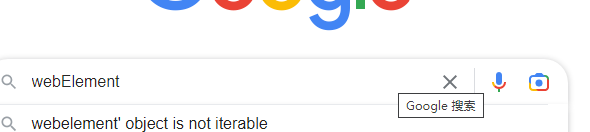
driver.Navigate().GoToUrl("https://www.google.com");
// Adds the cookie into current browser context
driver.Manage().Cookies.AddCookie(new Cookie("key", "value"));
driver.FindElement(By.CssSelector("[name='q']")).SendKeys("webElement");
// Get attribute of current active element
var btnK = driver.FindElement(By.Name("btnK"));
btnK.Click();
}
finally
{
driver.Quit();
}
This concludes the tutorial on using C# to develop Selenium WebDriver. Readers can refer to the official documentation for more information.

文章评论