本教程已加入 Istio 系列:https://istio.whuanle.cn
2. Deploy Istio
In this chapter, we will introduce how to deploy Istio in Kubernetes using Helm.
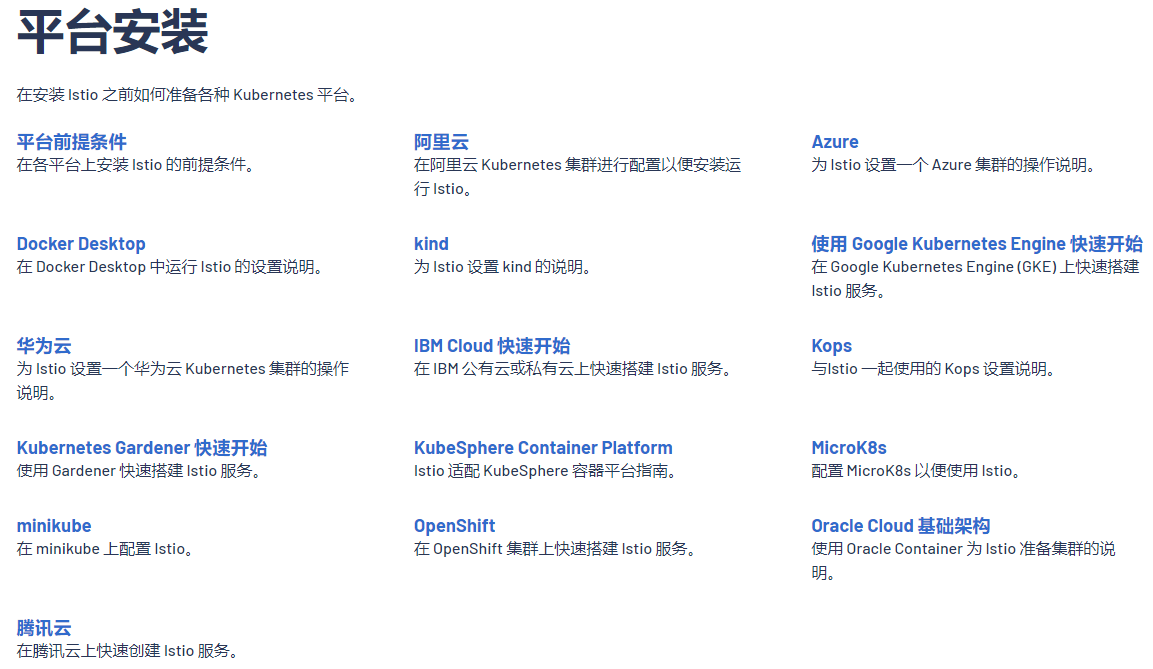
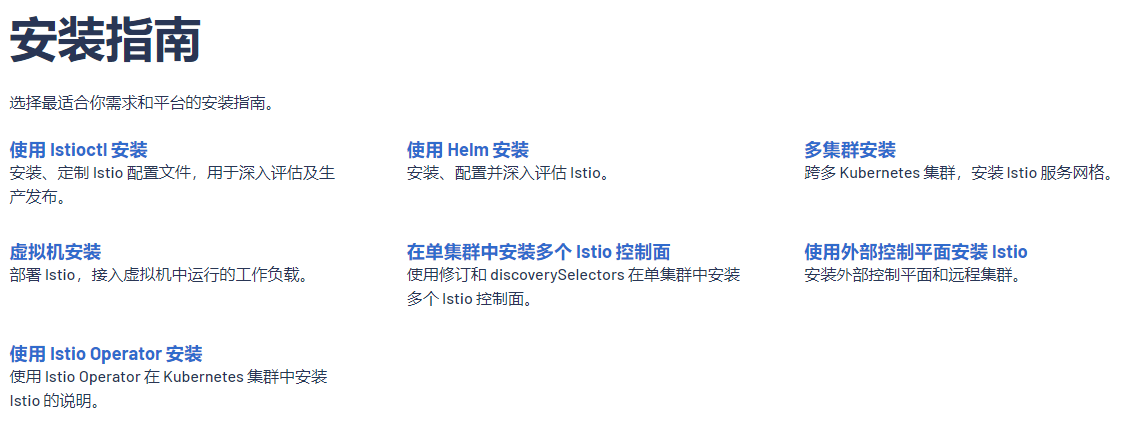
The installation methods for Istio can be broadly classified into two categories: the first category is installation based on native Kubernetes clusters or virtual machines. The other category is installation on public or private cloud platforms like Azure, KubeSphere, or Kubernetes management platforms. This chapter focuses on the Helm installation based on Kubernetes.
The Istio official website provides many details about these two deployment methods, and readers can obtain deployment information from the official resources based on their actual needs.
https://istio.io/latest/en/docs/setup/platform-setup/
https://istio.io/latest/en/docs/setup/install/
Installing Helm
First, add the Helm official repository address to the apt source.
curl https://baltocdn.com/helm/signing.asc | sudo apt-key add -
echo "deb https://baltocdn.com/helm/stable/debian/ all main" | sudo tee /etc/apt/sources.list.d/helm-stable-debian.list
Then update the package index.
apt-get update
Install Helm using the apt command.
apt-get install helm
Verify if the installation was successful.
helm version

Deploying istio-base
Google provides very little descriptive information about istio-base, so we have to ask ChatGPT for help.
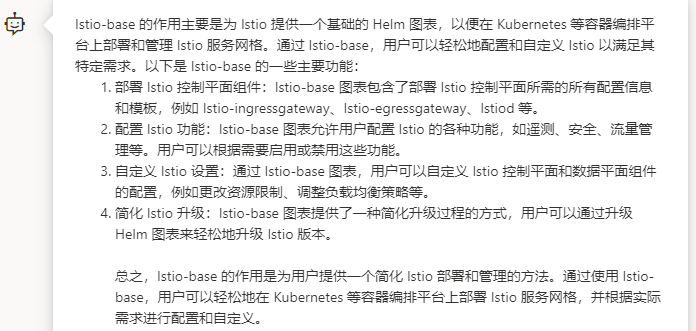
This means that we must install istio-base before we can install other Istio components.
In this tutorial, the installation of Istio differs from the official deployment method using istiocli; this tutorial will gradually install the required components instead of installing all components at once. This approach helps readers gradually understand the functions of different Istio components and their installation methods.
Add the Istio repository in Helm.
helm repo add istio https://istio-release.storage.googleapis.com/charts
helm repo update
Next, pre-create the namespace for Istio components called istio-system.
kubectl create namespace istio-system
Now, we will use Helm to install the Istio components in the istio-system namespace.
First, install the Istio CRD:
helm install istio-base istio/base -n istio-system
root@k8smain:~# helm install istio-base istio/base -n istio-system
NAME: istio-base
LAST DEPLOYED: Tue May  2 07:19:15 2023
NAMESPACE: istio-system
STATUS: deployed
REVISION: 1
TEST SUITE: None
NOTES:
Istio base successfully installed!

To learn more about the release, try:
  $ helm status istio-base
  $ helm get all istio-base
Use the helm ls command to verify the installation status of the Istio CRD:
root@k8smain:~# helm ls -n istio-system
NAME      	NAMESPACE   	REVISION	UPDATED                                	STATUS  	CHART      	APP VERSION
istio-base	istio-system	1       	2023-05-02 07:19:15.792125237 +0000 UTC	deployed	base-1.17.2	1.17.2
If the STATUS is deployed, it indicates that the installation was successful, and we can proceed to the next step.
Deploying istiod
Istiod (Istio Discovery) is the core component of the Istio service mesh, responsible for control plane functions.
Istiod has five main functions:
-
Configuration management: Responsible for distributing and synchronizing Istio configurations to the data plane (Envoy proxy).
-
Service discovery: Generates service discovery data based on Kubernetes Service and Endpoint information, which is used for load balancing in Envoy Proxy.
-
Certificate management: Provides certificate issuance for Envoy Proxy to support mutual TLS authentication.
-
Validation and transformation: Validates the correctness of Istio configuration resources and transforms them into a format understandable by Envoy Proxy.
-
Envoy proxy injection: Responsible for injecting Envoy Proxy into service Pods for traffic interception and routing.
Just take a quick look, no need to memorize.
The new version of Istiod combines scattered components like Mixer, Pilot, Citadel, and Galley from the old version, so when looking for documentation online, pay attention to avoid outdated content.
Add the Istiod repository in Helm.
helm install istiod istio/istiod -n istio-system --wait
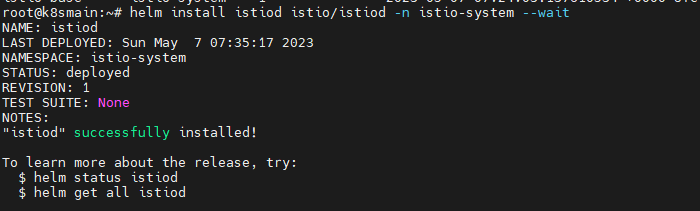
Verify the installation status of Istiod:
root@k8smain:~# helm ls -n istio-system
NAME      	NAMESPACE   	REVISION	UPDATED                                	STATUS  	CHART        	APP VERSION
istio-base	istio-system	1       	2023-05-02 07:19:15.792125237 +0000 UTC	deployed	base-1.17.2  	1.17.2
istiod    	istio-system	1       	2023-05-02 07:21:07.791242626 +0000 UTC	failed  	istiod-1.17.2	1.17.2
Check whether the istiod service is successfully installed and its Pod is running:
root@k8smain:~# kubectl get deployments -n istio-system -o wide
NAME     READY   UP-TO-DATE   AVAILABLE   AGE   CONTAINERS   IMAGES                         SELECTOR
istiod   1/1     1            1           10m   discovery    docker.io/istio/pilot:1.16.1   istio=pilot
Deploying istio-ingressgateway
istio-ingressgateway (Istio Ingress Gateway) is similar to Kubernetes Ingress and serves as the entry component controlling external traffic entering Kubernetes. The istio-ingressgateway acts as an entry point, allowing access to services inside the service mesh from outside the service mesh, similar to entry gateways like nginx and apisix.
The main functions of the Istio Ingress Gateway include:
-
Receiving traffic from outside the cluster and routing requests to the appropriate internal services based on Istio configurations (serving as a gateway).
-
Providing load balancing and traffic control functions, including request routing, retries, timeouts, and circuit breaking (traffic governance).
-
Supporting TLS configuration to encrypt traffic before it enters the service mesh (configuring certificates for the domain name).
-
Supporting mutual TLS authentication to enhance the security of the service mesh (communication between services).
-
Offering Metrics, Tracing, and Logging collection for better observation and monitoring of traffic (requires self-installation of corresponding components).
Just take a quick look, no need to memorize.
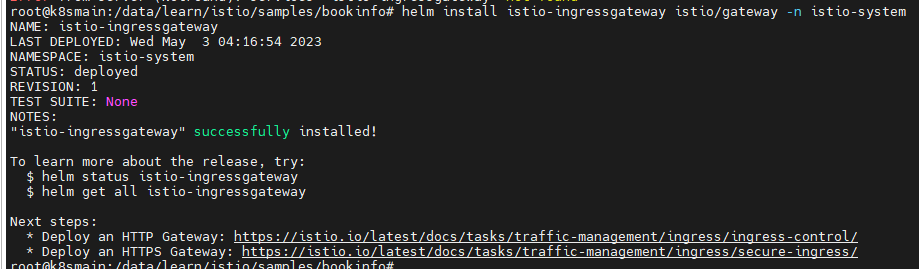
Install istio-ingressgateway.
helm install istio-ingressgateway istio/gateway -n istio-system
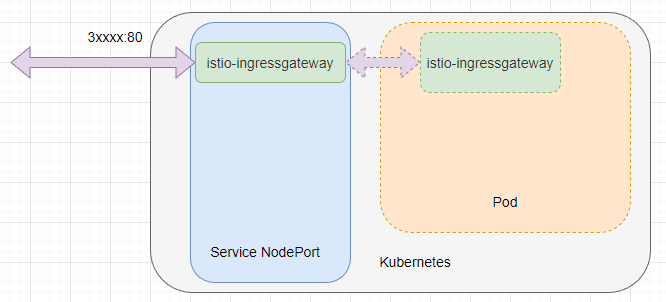
In fact, istio-ingressgateway is provided as a Kubernetes Service for external access.

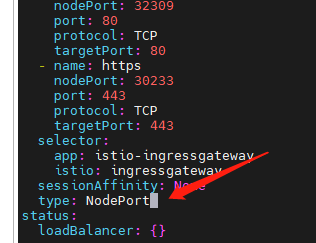
Since Istio-ingressgateway defaults to using LoadBalancer, it requires support from a public cloud platform; otherwise, it will remain in <pending>. Therefore, we need to modify the Service, changing the network type of istio-ingressway from LoadBalancer to NodePort to allow access via the server's IP.
kubectl edit svc istio-ingressgateway -n istio-system
Find type: LoadBalancer and change it to type: NodePort.
Since
LoadBalancerincludesNodePort, it's actually okay not to modify it.
istio-ingressgateway itself includes a Kubernetes Service and Pod, allowing external traffic to reach the istio-ingressgateway Pod by exposing a node port.
After the traffic is analyzed by Istio, it is forwarded to one of the Pods through load balancing.
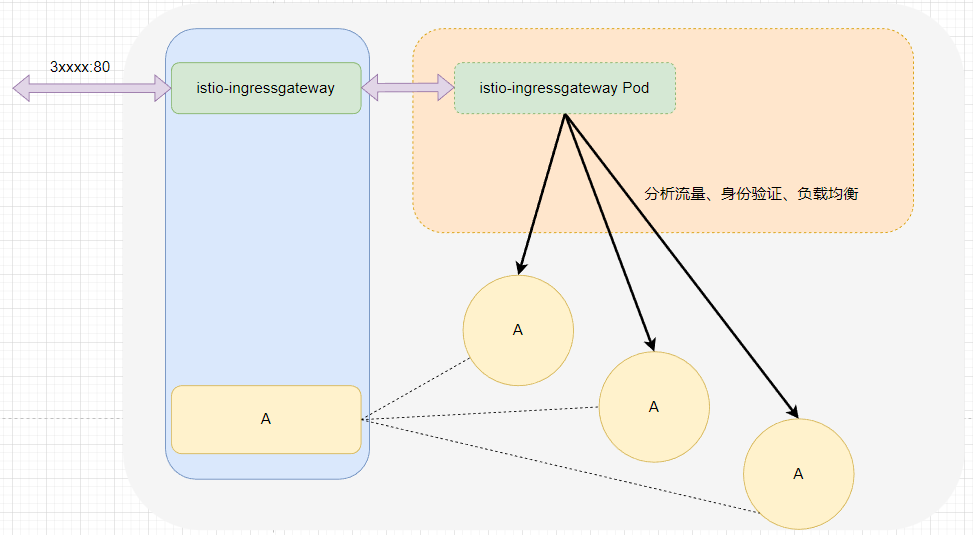
After the traffic enters Istio, it does not need to be forwarded to a Service but still relies on the Service. Istio obtains all the Pods from the Service, and then Istio directly forwards the traffic to the Pods, executing a series of tasks such as circuit breaking and fault processing.
After completing the above steps, we have installed and understood the three basic Istio components: istio-base, istiod, and istio-ingressgateway. In the subsequent chapters, we will start practicing using Istio to solve some issues in microservices.
Cleanup
If one day you no longer need Istio, you can use the following commands to clear the deployed Istio applications.
helm delete istio-ingressgateway -n istio-system
helm delete istiod -n istio-system
helm delete istio-base -n istio-system

kubectl delete namespace istio-system

文章评论