学习模型开发时,搭建环境可能会碰到很多曲折,这里提供一些通用的环境搭建安装方法,以便读者能够快速搭建出一套 AI 模型开发调试环境。
Installing Graphics Card Drivers and Development Libraries
This article only covers the installation method for NVIDIA graphics card drivers.
There are multiple series of NVIDIA graphics cards, commonly including Tensor and GeForce RTX series. The driver installation methods for these two types of graphics cards differ; the following sections will explain how to install the drivers separately.
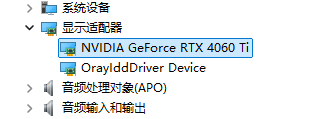
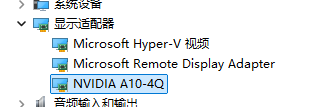
The first step is to check whether the computer correctly recognizes the graphics card or if the driver is installed.
Open Device Manager, click on Display adapters, and check if the graphics card is listed in the device list.
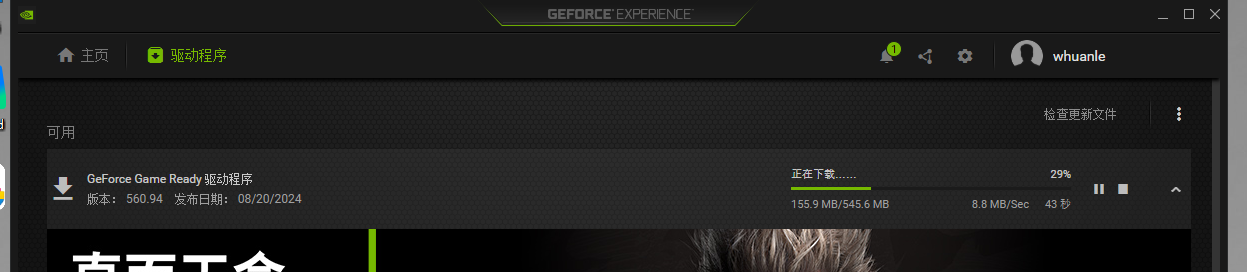
If the computer has recognized the graphics card, you can update the driver to the latest version through NVIDIA GeForce Experience or other driver management tools.
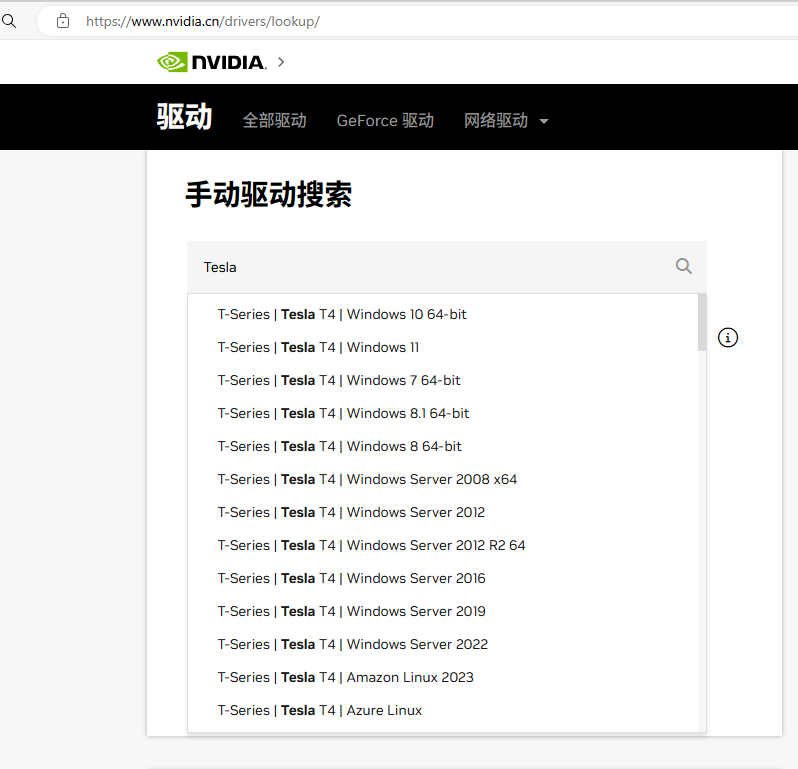
Alternatively, you can go directly to the official driver page to search for the driver program suitable for your graphics card model. The official NVIDIA driver search download page is: https://www.nvidia.cn/drivers/lookup/
For Tesla Series Graphics Cards
For example, after creating a GPU server on cloud platforms like Azure, if the graphics card is a Tesla and does not recognize the graphics card upon startup, you need to install the driver first before the graphics device can be displayed.
For Windows, refer to this link for installation: https://learn.microsoft.com/zh-CN/azure/virtual-machines/windows/n-series-driver-setup
For Linux, refer to this link for installation: https://learn.microsoft.com/zh-CN/azure/virtual-machines/linux/n-series-driver-setup
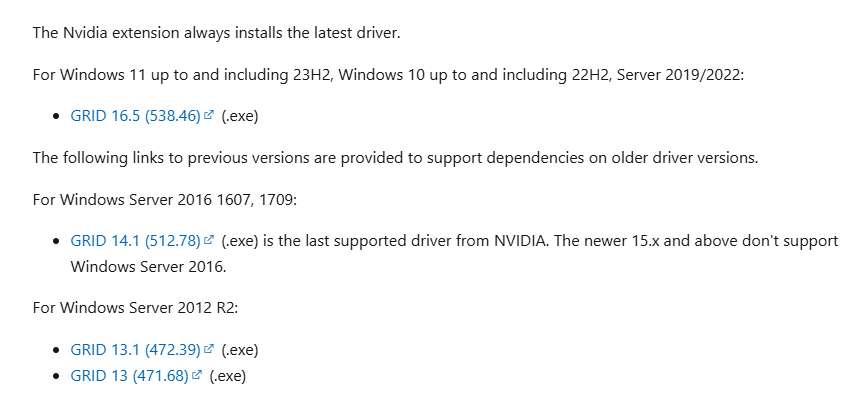
For Windows, the installation method is relatively simple; you just need to download the GRID program installation package according to the documentation.
After installing the driver, use the following command to check the supported CUDA version:
nvidia-smi
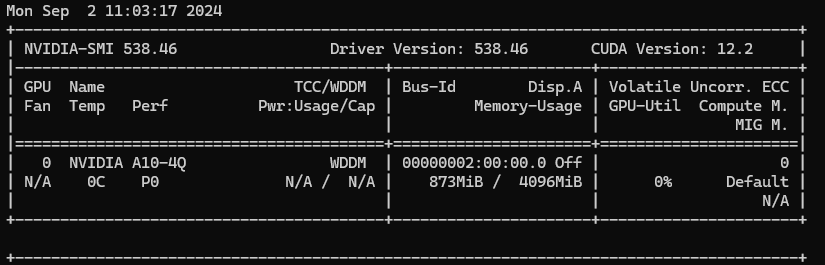
You can see that this driver version only supports CUDA version 12.2.
For GeForce Cards
For graphics cards like GeForce RTX 4060TI and GeForce RTX 4070, you can directly download the driver installer from the official website:
https://www.nvidia.cn/geforce/drivers/
Generally speaking, home desktops usually come with the drivers already installed from the factory.
Installing CUDA and cuDNN
CUDA is a parallel computing platform and programming model developed by NVIDIA specifically for general-purpose computing on graphics processing units (GPUs). With CUDA, developers can significantly accelerate computing applications by leveraging the powerful performance of GPUs.
In simple terms, CUDA is a programming model that supports CPU distribution and GPU parallel computation. To use CUDA, you need to install the development toolkit.
Introduction to CUDA:
https://developer.nvidia.cn/cuda-zone
https://developer.nvidia.com/zh-cn/blog/cuda-intro-cn/
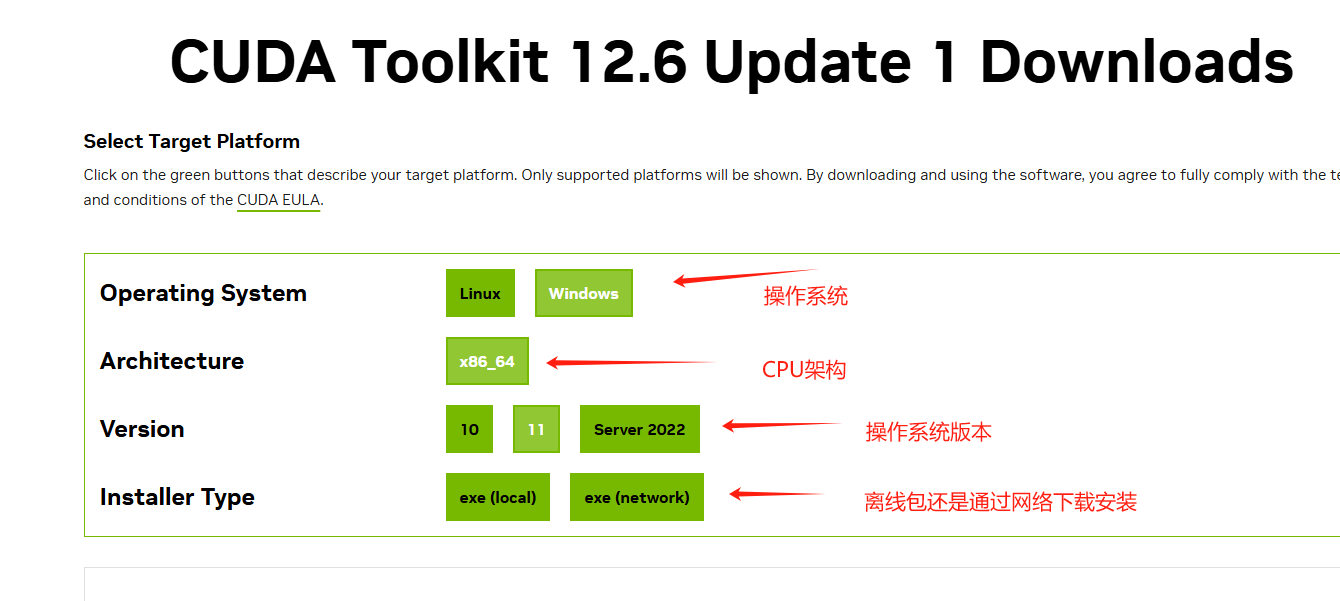
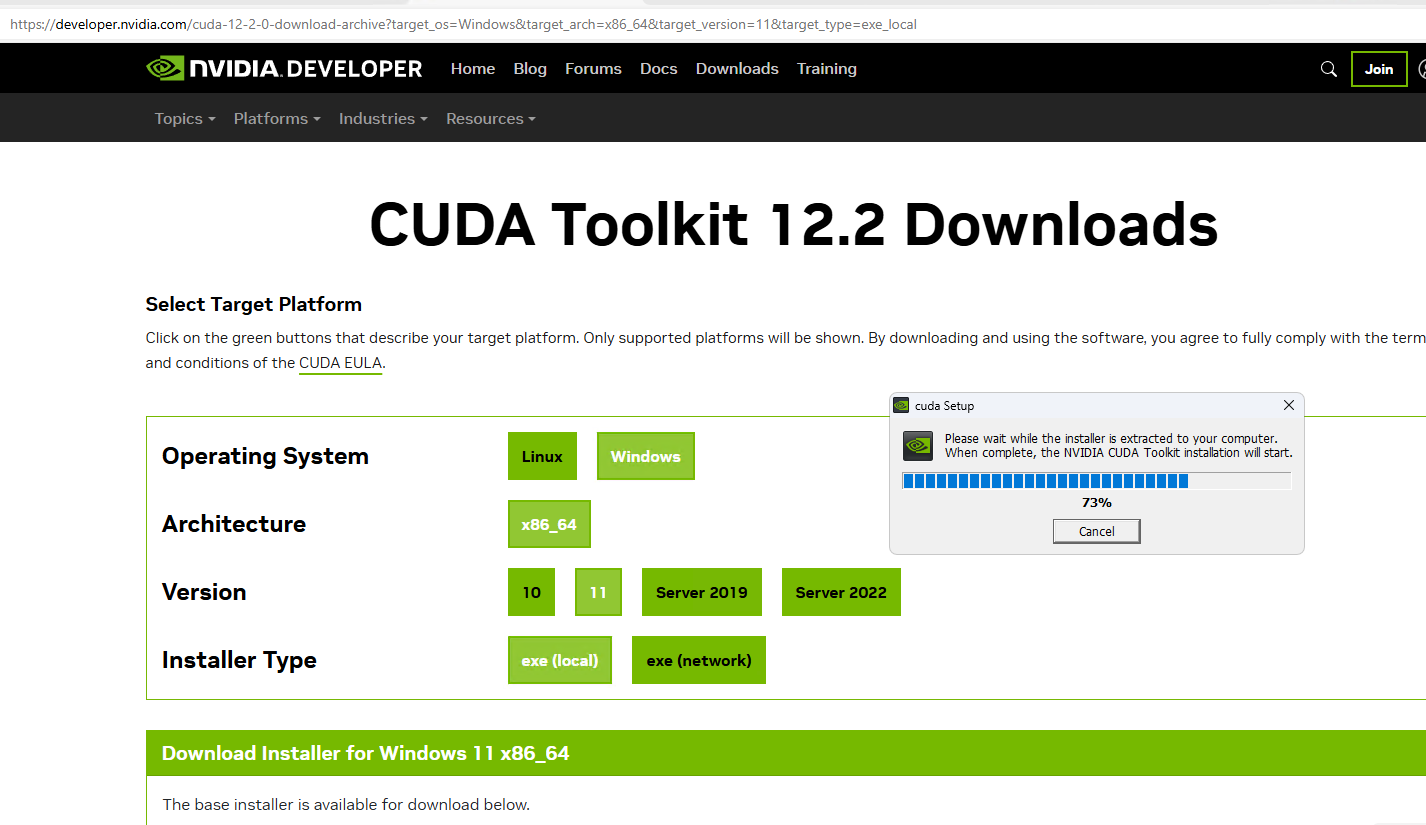
CUDA installation package download address: https://developer.nvidia.com/cuda-downloads
Download the installation package and follow the prompts to install it. The simple installation will install it on the C drive, while the advanced installation allows you to customize the installation location. It is recommended to use the simple installation to avoid additional issues.
After installation, two entries will be added to the environment variables:

cuDNN is a GPU-accelerated library for deep learning. After downloading, the file is a compressed package.
Download address: https://developer.nvidia.com/cudnn-downloads
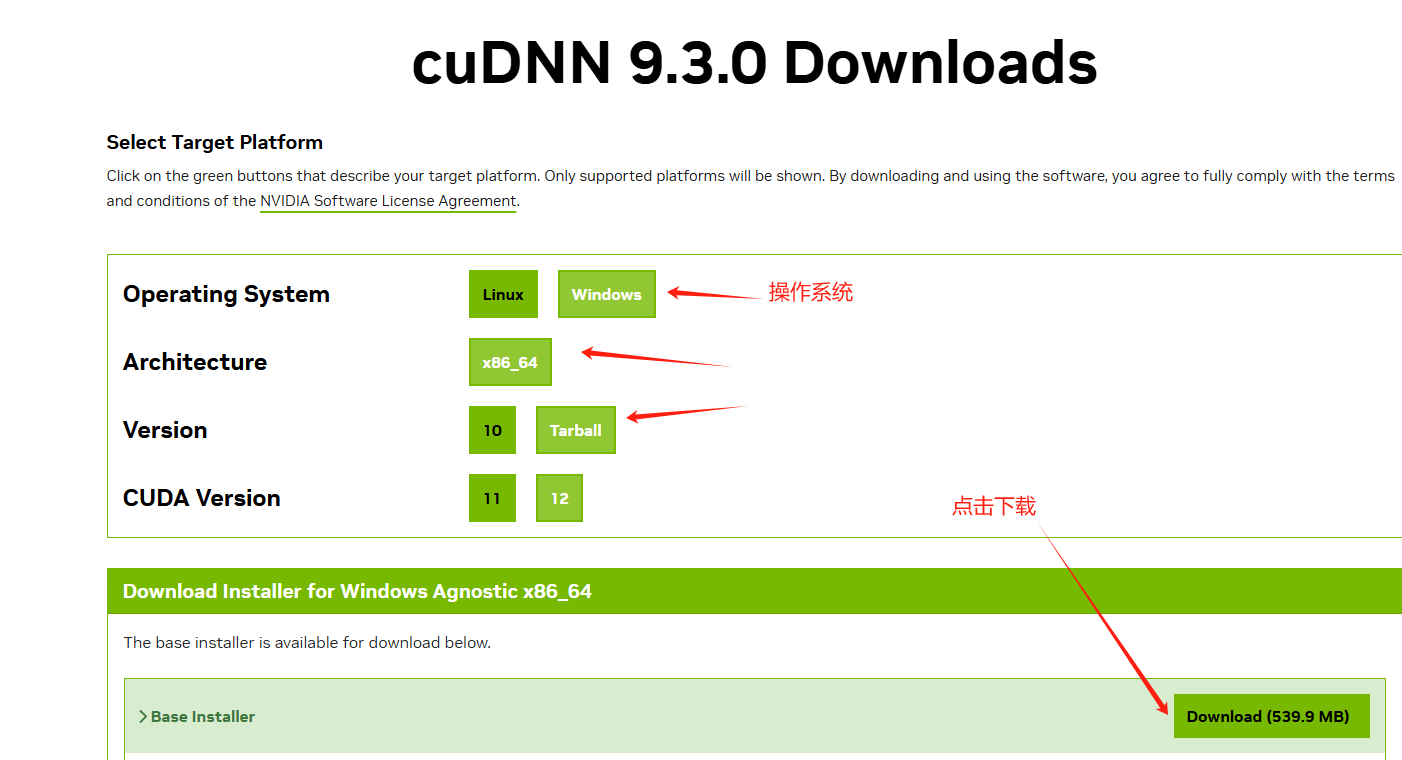
Open C:\Program Files\NVIDIA GPU Computing Toolkit\CUDA\, locate the version directory, or find the installation directory via the environment variable CUDA_PATH, and copy the contents of the cuDNN compressed package into the CUDA directory.
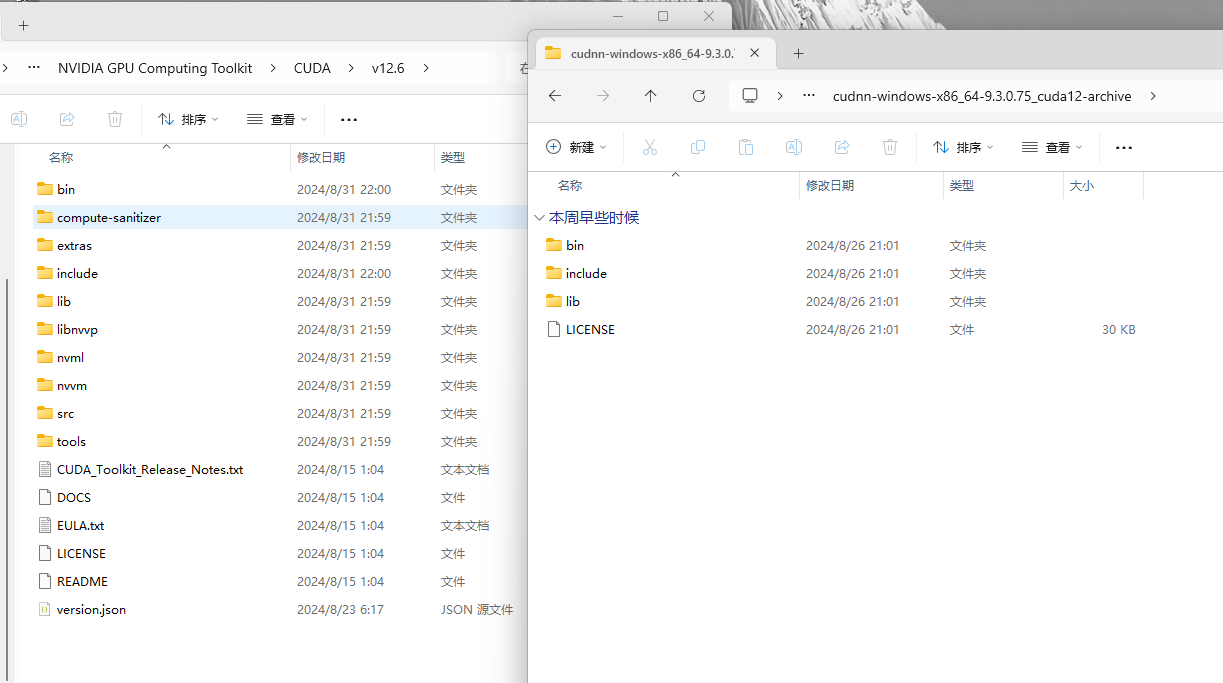
Finally, add the five directories: bin, lib, lib\x64, include, and libnvvp to the environment variable Path.
It is unclear exactly how many environment variables are needed, just add them.
Installing Miniconda
Miniconda is a Python package manager that can create multiple isolated Python environments in the system.
Download address: https://docs.anaconda.com/miniconda/
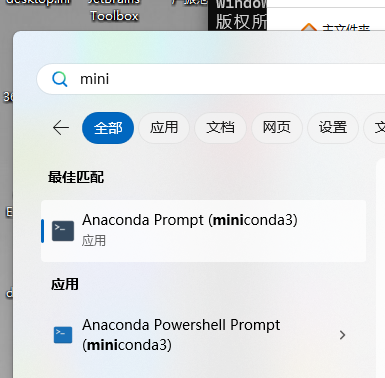
After downloading, search for the miniconda3 shortcut menu, run it as an administrator, and you can open the console; the menu list will have shortcuts for cmd and powershell; it is recommended to use the powershell entry.
Subsequent execution of conda commands must be done with administrator privileges.
Configure domestic sources to speed up downloads:
conda config --add channels https://mirrors.tuna.tsinghua.edu.cn/anaconda/pkgs/free/
Execute conda env list to view the default environment installation directory.

If Python has already been installed on the computer and added to the environment variables, do not add G:\ProgramData\miniconda3 to the environment variables, as this will cause the environments to become disorganized.
If Python has not been installed on the computer yet, you can directly add G:\ProgramData\miniconda3 and G:\ProgramData\miniconda3\Scripts to the environment variables.
The author uninstalled the manually installed Python and only uses the environment provided by miniconda3.
If Python or pip is using a self-installed version, when executing commands to install dependencies, it will be isolated from the miniconda3 environment. To install dependencies in the miniconda3 environment, you need to open the miniconda3 console and execute the pip command, so that the installed packages will appear in the miniconda3 environment.
After installing the dependencies in one environment, different projects can share the downloaded dependencies without needing to download each one separately.
Installing PyTorch and Transformers
Flax, PyTorch, or TensorFlow are all deep learning frameworks, while Transformers can use Flax, PyTorch, or TensorFlow as its underlying deep learning framework for loading, training, and other functionalities.
For PyTorch installation reference: https://pytorch.org/get-started/locally/
You can install either the GPU version (CUDA) or the CPU version, then copy the installation command provided below.
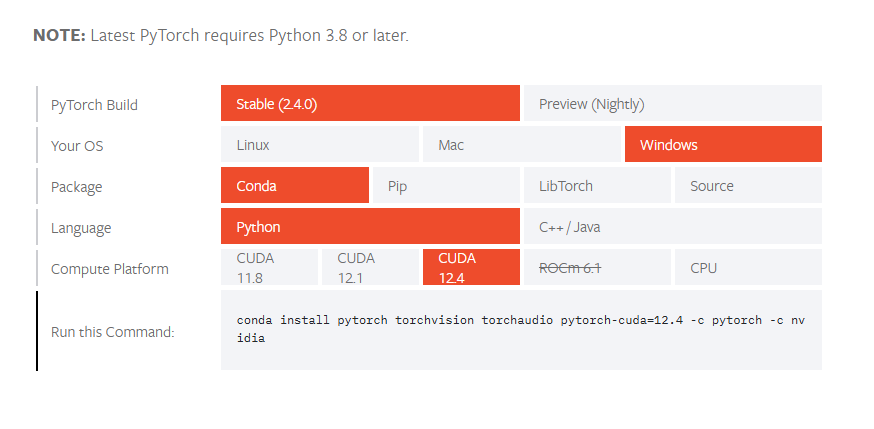
conda install pytorch torchvision torchaudio pytorch-cuda=12.4 -c pytorch -c nvidia
Next, execute the command to install Transformers and some dependency libraries.
pip install protobuf 'transformers>=4.41.2' cpm_kernels 'torch>=2.0' gradio mdtex2html sentencepiece accelerate
It may automatically install the latest version of transformers, which may cause issues; the following sections will discuss how to resolve this.
Using Modelscope to Download and Load Models
ModelScope is an AI model community led by Alibaba Cloud, providing various models, datasets, and development toolkits. Due to the high difficulty of using huggingface and issues with foreign networks, we will use Modelscope to download and load models.
To install modelscope:
pip install modelscope
PyCharm Project Configuration
PyCharm is the most commonly used Python programming tool, so here we will explain how to configure the miniconda3 environment in PyCharm.
Open PyCharm, and add the miniconda3 environment in the settings, as shown in the steps below.
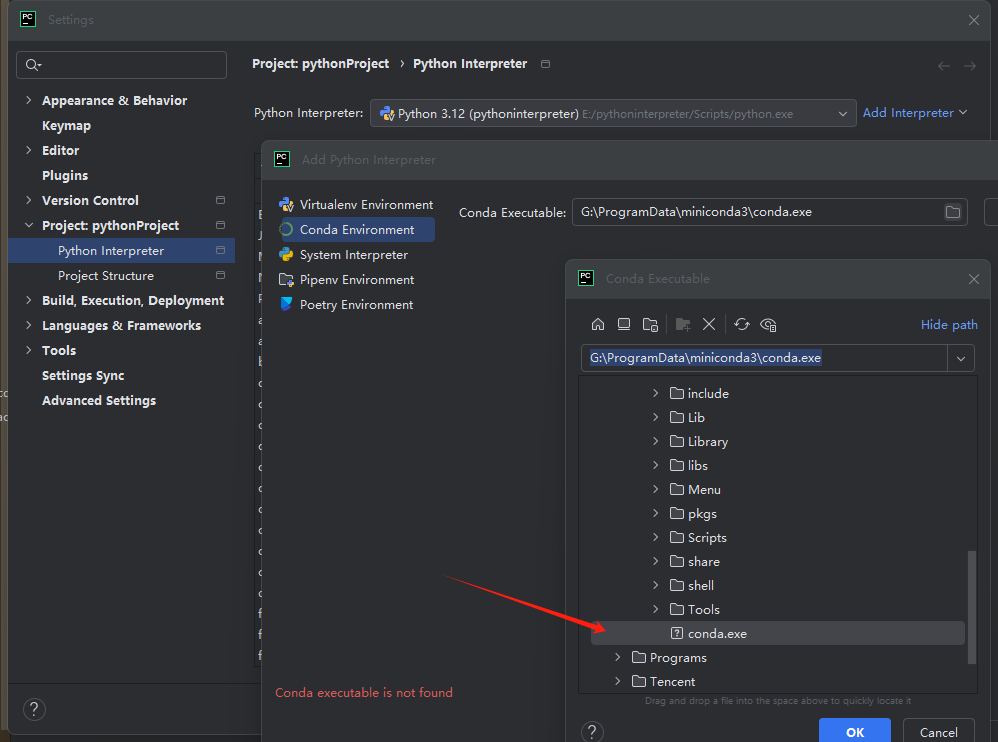
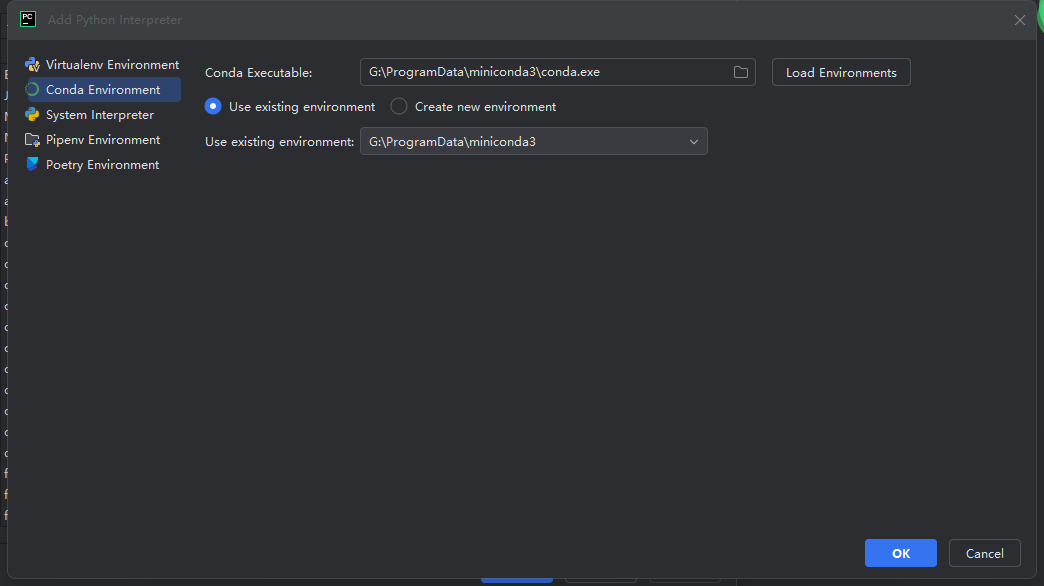
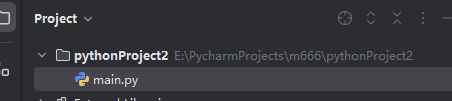
Then create a project, selecting a conda-based environment in the project.

Model Loading and Conversation
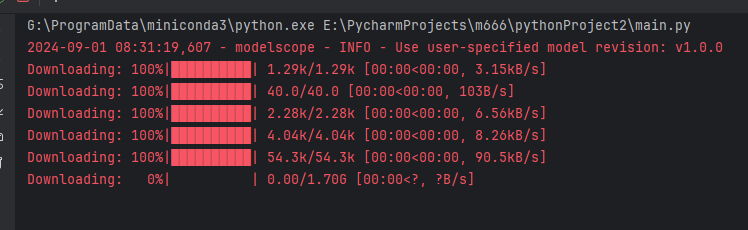
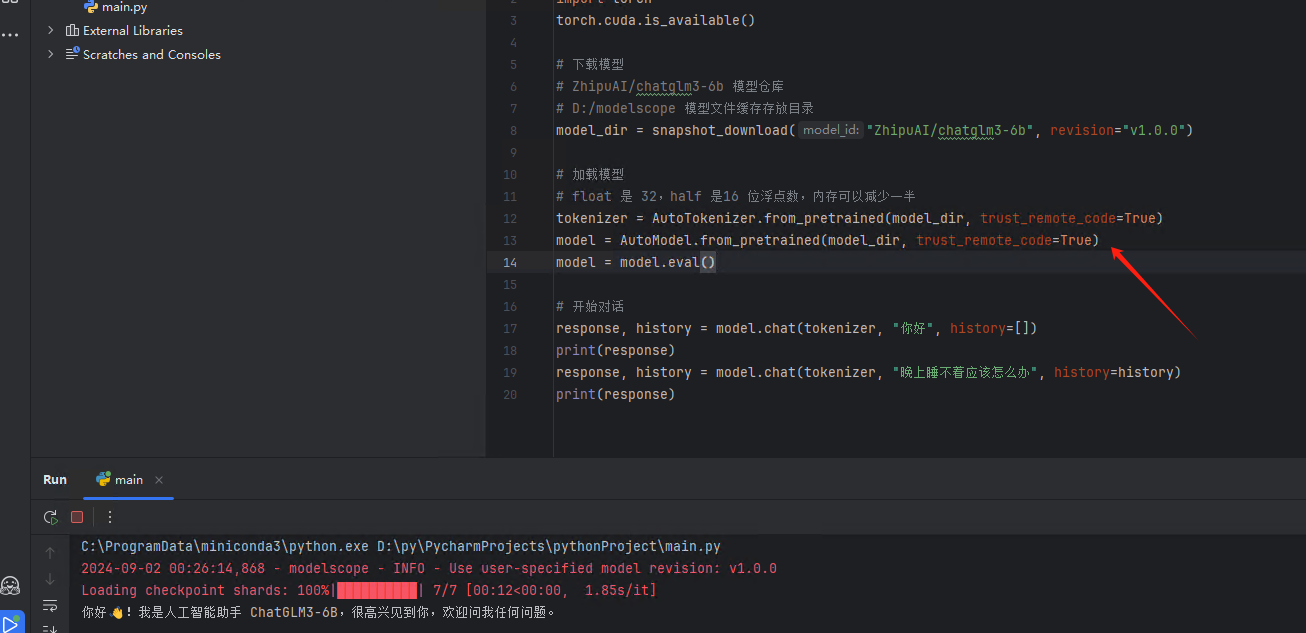
Create a main.py file in the project directory.
Copy the following code into main.py, and when you run the code, it will automatically download the model, load the model, and initiate a conversation.
from modelscope import AutoTokenizer, AutoModel, snapshot_download

# Download the model
# ZhipuAI/chatglm3-6b model repository
# D:/modelscope model file cache storage directory
model_dir = snapshot_download("ZhipuAI/chatglm3-6b",cache_dir="D:/modelscope", revision="v1.0.0")

# Load the model
# float represents 32-bit, half represents 16-bit floating point, which can reduce memory by half
tokenizer = AutoTokenizer.from_pretrained(model_dir, trust_remote_code=True)
model = AutoModel.from_pretrained(model_dir, trust_remote_code=True).half().cuda()
model = model.eval()

# Start a conversation
response, history = model.chat(tokenizer, "你好", history=[])
print(response)
response, history = model.chat(tokenizer, "晚上睡不着应该怎么办", history=history)
print(response)
"ZhipuAI/chatglm3-6b" refers to the chatglm3-6b model in the ZhipuAI repository. You can view various models uploaded by the community on ModelScope:
https://www.modelscope.cn/models
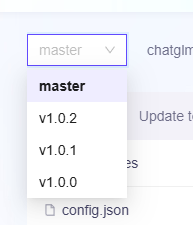
The revision="v1.0.0" download version number corresponds with the repository branch name and can be modified to download different versions based on different branch names.
CPU and GPU Issues
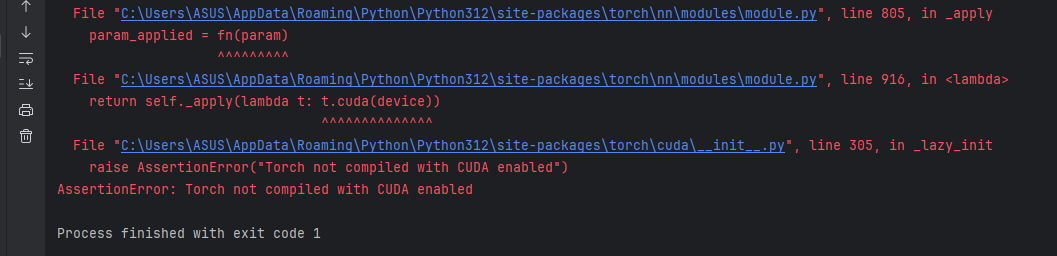
If you encounter the following error, it is possible that the CPU version, rather than the GPU version of PyTorch, is installed.
    raise AssertionError("Torch not compiled with CUDA enabled")
AssertionError: Torch not compiled with CUDA enabled
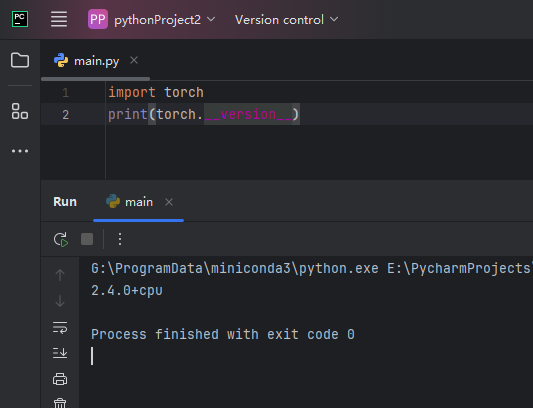
Execute the following code:
import torch
print(torch.__version__)
Based on experience, if libraries were installed using pip instead of conda commands, you should execute the following command to uninstall PyTorch:
pip uninstall torch torchvision torchaudio
conda uninstall pytorch torchvision torchaudio pytorch-cuda=12.4 -c pytorch -c nvidia
Then execute the command to reinstall PyTorch:
conda install pytorch torchvision torchaudio pytorch-cuda=12.4 -c pytorch -c nvidia
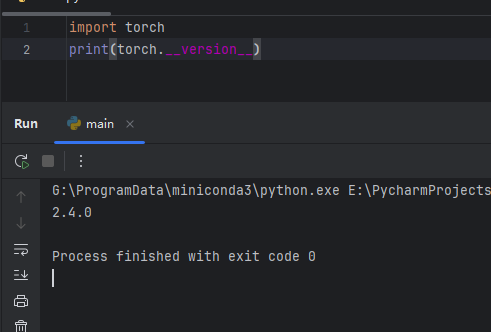
You should be able to run the commands successfully again afterwards:
Transformers Version Errors
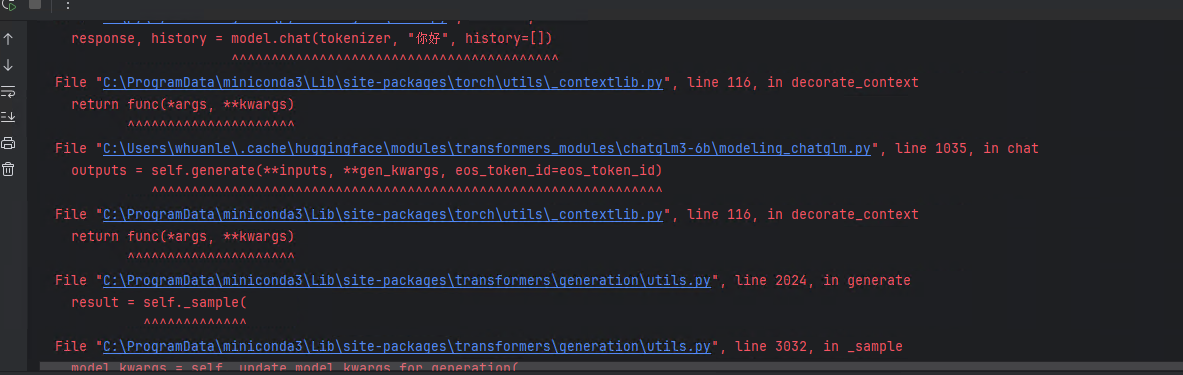
Since the libraries were installed with the latest versions, some libraries may be incompatible, and when executing the following line of code, an error may be thrown.
response, history = model.chat(tokenizer, "你好", history=[])
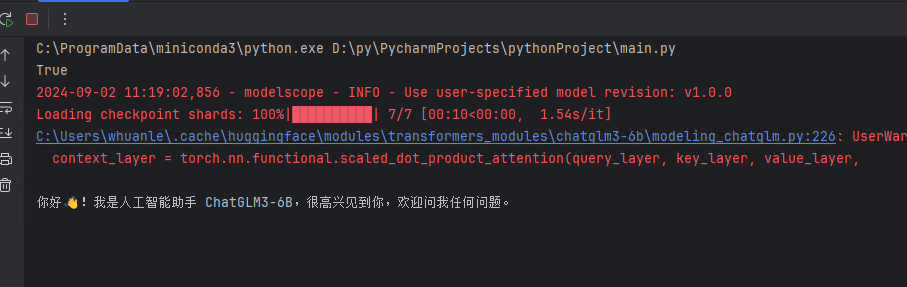
First, you may see the following warning and then encounter an error:
Torch was not compiled with flash attention. (Triggered internally at C:\cb\pytorch_1000000000000\work\aten\src\ATen\native\transformers\cuda\sdp_utils.cpp:555.)
  context_layer = torch.nn.functional.scaled_dot_product_attention(query_layer, key_layer, value_layer,
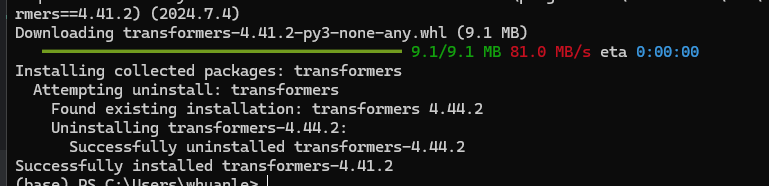
You need to install the required latest version of transformers (upgrade).
pip install transformers==4.41.2
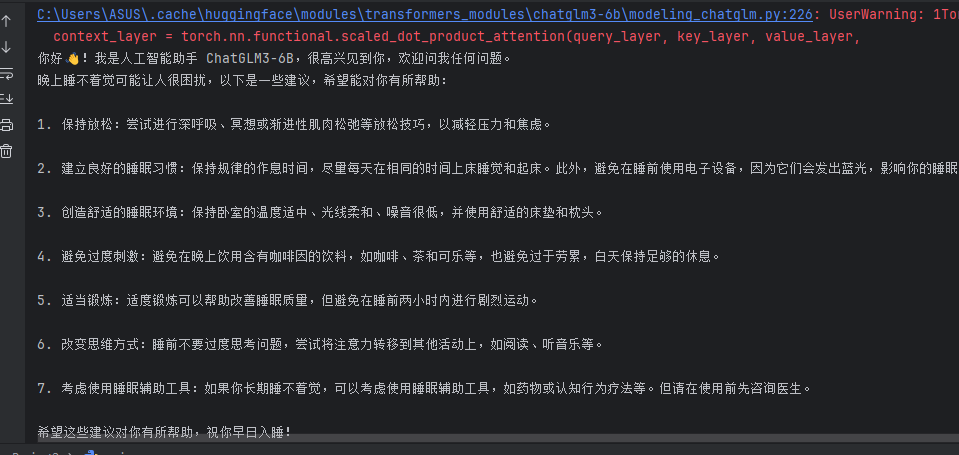
After overcoming various hurdles, it was finally successful:
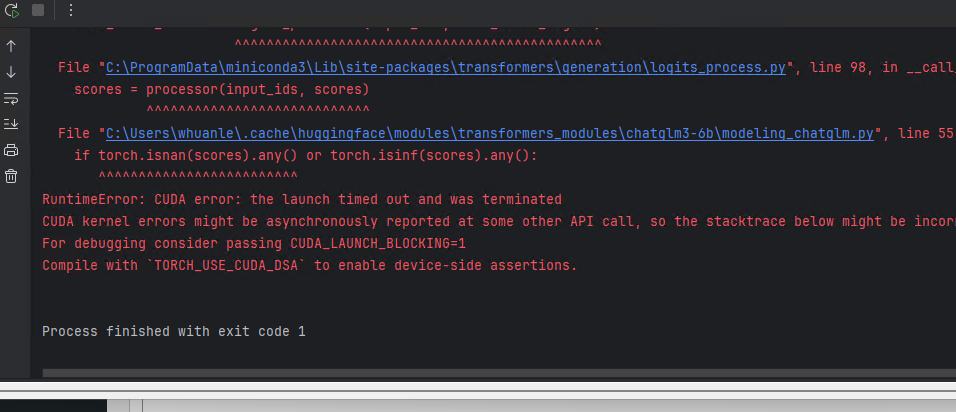
TORCH_USE_CUDA_DSA Error
The issue encountered by the author seems to be caused by insufficient GPU performance, which appeared on an Azure A10 machine, while a home RTX 4060TI did not encounter this issue.
However, it could also be due to inconsistencies between the graphics card driver and the CUDA version.
  File "C:\ProgramData\miniconda3\Lib\site-packages\transformers\generation\utils.py", line 2410, in _sample
    next_token_scores = logits_processor(input_ids, next_token_logits)
                        ^^^^^^^^^^^^^^^^^^^^^^^^^^^^^^^^^^^^^^^^^^^^^^
  File "C:\ProgramData\miniconda3\Lib\site-packages\transformers\generation\logits_process.py", line 98, in __call__
    scores = processor(input_ids, scores)
             ^^^^^^^^^^^^^^^^^^^^^^^^^^^^
  File "C:\Users\xxx\.cache\huggingface\modules\transformers_modules\chatglm3-6b\modeling_chatglm.py", line 55, in __call__
    if torch.isnan(scores).any() or torch.isinf(scores).any():
       ^^^^^^^^^^^^^^^^^^^^^^^^^
RuntimeError: CUDA error: the launch timed out and was terminated
CUDA kernel errors might be asynchronously reported at some other API call, so the stacktrace below might be incorrect.
For debugging consider passing CUDA_LAUNCH_BLOCKING=1
Compile with `TORCH_USE_CUDA_DSA` to enable device-side assertions.
Using CPU works fine:
Ran a demo casually, and it executed successfully.
https://github.com/pytorch/examples/blob/main/mnist/main.py
The issue might be caused by an inconsistency between the CUDA library and driver library versions. First, run the nvidia-smi command to check the CUDA version compatible with your graphics card driver library.
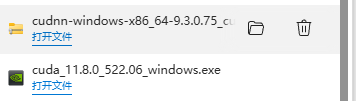
Download and install the corresponding version of CUDA, then unzip cuDNN again and set the environment variables.
Finally, the server has successfully set up the AI environment.

文章评论